
DIY Decorative Magnetic Chalkboard
/
This has been one of my favorite projects that I have made this year! It is a magnetic chalkboard in a decorative frame with a touch of shabby chic-ness! There are quite a few steps to make this, but here goes...
What you need:
- wooden plate frame
- plaster of paris
- acrylic paint
- paintbrush
- sandpaper or sanding block
- 9 in. baking tin
- chalkboard spray paint
- chalk
- ribbon
- decorative fabric flower, feathers beads, etc.


First you will need a wooden plate frame. A family member of mine used to collect those painted plates with scenes from different movies, etc. Well, to go along with these collector plates, they had boxes of wooden plate frames. So, you will need one wooden collector plate frame.

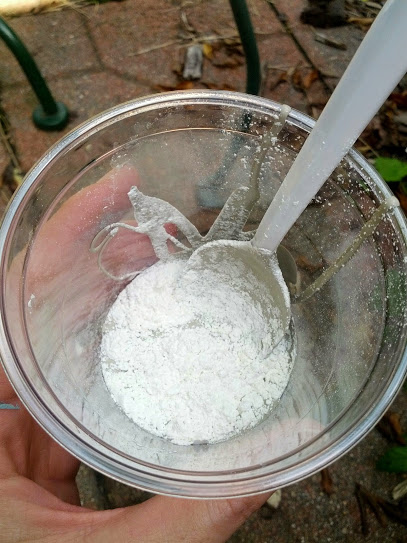
Lay your frame on some newspaper. Now it is time to paint it with some homemade chalk paint. You can buy chalk paint, but mixing your own is cheaper, and you can choose from any color of paint! To make chalk paint, simply mix your choice color of paint with a little bit of plaster of paris. I couldn't tell you the proportions because I usually just go by the consistency, which is different for each paint. You don't want it so chalky that it is clumpy- it should still be smooth, but thicker than regular paint.

Once your chalk paint is mixed, put a thick coat on your frame. Only one coat of paint should be necessary with the chalk paint. Don't get too perfectionistic with your paint job, you are going to be sanding it off in the next step anyway! Let it dry completely.

Now take some fine grained sandpaper or a sanding block and sand down the chalk paint so that the wood shows through along the edges of the frame. This should look like natural weathering, so it will be uneven and rustic looking. Be sure to use the wood's natural rises to your advantage to give it more depth. Here are two frames side by side of before and after the sanding.

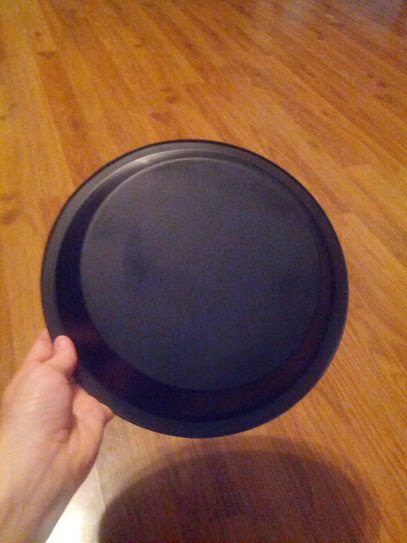
Brush off the paint dust and get ready to make the chalkboard part! What makes the adorable magnetic chalkboard center of this decorative frame? A simple dollar store 9 in. baking tin.

Take your baking dish and spray paint the back side of it with chalkboard paint. Make sure the pan is completely covered with a thick coat of paint. It is better to do several thin coats letting each coat dry before adding the next to get the best effect.
Then attach the baking tin to the frame. The frames already come with hardware on them. I take all of it off, saving the screws and the hanger to use again later. Use a hammer and nail to punch five holes in the lip of the baking tin- one on each side, one at the bottom, and two at the top the exact distance of the holes in the hanging hardware.

Use the screws saved from before to screw the baking tin into the frame with a hand held screwdriver.

Now you should have a completed frame!

Next you can add any decorative touches that you want. I use fabric flowers, beads, and feathers. Hot glue your decorative touches to the frame. I also add a piece of chalk tied to a ribbon that is glued to the frame so that something to write with is always handy!

There are lots of different designs that you can make using these plates frames. The magnetic chalkboard is my favorite, but I have tried several other designs as well.

You can use sheets of cork to create a corkboard.

Or you can slice wine corks and glue them onto fabric covered cardboard to create a corkboard with a little more dimension.

I think these plate frames are the perfect decorative touch for any home as well as keeping organized! Which one will you make?
