
10 Tips for Starting Seeds Indoors
/
I have tried starting seeds inside, outside, in the greenhouse, in six packs, in 4 inch pots, in peat pots, spray watering, hand watering, flood trays, grow lights, windowsill, potting soil, seed starter, store bought seed, catalogue seed, saved seed, and every plant you can imagine. Here is what I have learned about what matters and what doesn't.
1. Get the right light
Lighting is the MOST IMPORTANT factor to get right. You don't need to spend money on fancy grow lights specifically for plants, but you do need to get an abundant amount of light directly over your seedlings. After trying lots of different things, what I find works the best for a budget is to get shop lights from the hardware store at $12 a piece and use the daylight fluorescent bulbs in them. Suspend the lights from chains so that they hang only an inch or two above the tops of the plants and incrementally raise them as the plants grow. A sunny windowsill of well lighted area that isn't specifically designed for starting seeds will still grow plants, but the difference is HUGE! If you spend any time and money on starting seeds, get this right!

2. Dirt cheap
Getting the right soil is important...sometimes. I don't mean to be confusing, but I have found that some seeds need true seed starting mix while others get along fine or even better in regular potting soil. For seed starting mix I use the $5/ bag Jiffy Organic seed starter and it works great. For potting soil I use the $1/bag generic from the local garden center. So which seeds get which dirt? Most small seeds need the starter soil to keep them from drying out in order to germinate, while larger seeds need potting soil so that they don't get too much moisture and rot in the dirt before germinating. Here is how I break down the common seeds: In seed starter mix- peppers, tomatoes, most herbs, eggplant, spinach, lettuce, greens, etc. In potting soil- peas, beans, cucumbers, cantaloupe, watermelon, squash, okra, artichoke, etc.

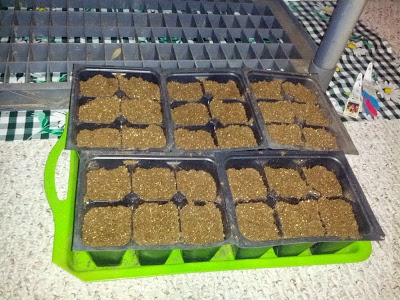
3. Water from the bottom
What is the best way to water seeds? Watering from the top can water log seeds, dislodge them while first germinating, or spread diseases. While some people spend lots of time misting their seeds to gently water them, it is much easier and more beneficial for the plants to water from below. In order to do this, place all of the seed containers in a tray that has a lip at least half an inch high. You can use special seed starting trays or, like I do, use plastic serving trays or cookie sheets from the dollar store. Pour water into the tray and let the soil soak the water up to the roots from the bottom. Not only does this keep the leaves dry and disease free and not disturb the seeds in the soil, but it also encourages strong root growth by directing the roots to grow deep into the pots rather than that staying at the surface.
4. Add liquid sunshine
What kind of water is best for seeds? Using tap water is okay, but not best since it has added minerals and is purified. Well water can very hard and have too many hard minerals in it. The best water to give your new seedlings is rain water. You can collect it in a rain barrel or just set a 5 gallon bucket at the eave of the house to collect it. This isn't a huge deal breaker at all, but if you want the optimum conditions for the seedlings, give them liquid sunshine!
5. Temperature
Different seeds require different temperatures to germinate. Most seeds will germinate at the comfortable temperature that you keep your home (65F-73F). There are some seeds that prefer warmer temperatures, specifically eggplant and peppers. These like to germinate at 80F. If you keep them at regular room temperature, some will still germinate, but if you are planning on a bumper crop of peppers, you may consider getting a heating pad for the peppers seeds.
6. Seeds are seeds
I have bought very expensive seeds and very cheap seeds, and I have found that all seeds do the same thing- they grow into plants. Unless you are looking for a rare or specific variety of plant, I suggest getting the least expensive seeds you can get your hands on. I personally prefer heirloom varieties so that I can save my own seed from strong plants to replant the following year. SOme of my favorite places to get seed is dollarseed.com (all heirloom, non-GMO seeds for $1 per packet) and the dollar store (their packets are just $.25/each!). Finding cheaper seeds or saving your own really cuts down on the cost per plant to start your own vegetable transplants.

7. A container is just a container
What do I put the plants in? Whatever you want! The container doesn't make that much of a difference on its growth, but there are some considerations. If you are using flood trays to water, don't fold your own containers out of newspaper because they won't hold up. A few container options include paper egg cartons, cups with holes in the bottom, old plastic 6 packs or 4 inch pots, peat pots, etc. The possibilities are endless so buy something new or recycle something you already have!

Some plants like lettuce can be put into tiny containers like the 32 plants per tray, while other plants like tomatoes need more space. If you put them in a container too small, you will have to transplant several times before putting them out into the garden. My container of choice are reused 6 packs from last season's annual flowers. I disinfect them to get rid of any possible disease, and reuse them time and again. I will only have to transplant my tomatoes one time into 4 inch pots before putting them right into the garden.
9. When to begin
When to start your seeds inside is dependent on several factors. Base all of your start dates based on the average last frost date for your area. Check for your zone and that will determine your last frost date. Then, research each seed type from there. Some plants are long growing and will need to be started as early as 8-10 weeks before the last frost date. Do your research and get the timing right because you don't want to start your plants so early that they are huge when you put them in the ground, but you also want to get in enough growth to make starting them indoors worth your time.
10. Making the jump outside
You have given your plants such a controlled and wonderful environment for growing that they have now become spoiled rotten! In order to get them ready to go outside into the real world of temperature, light, and water variations they will need to be "hardened off". In order to do this, set the plants out in a shady spot for a few hours each day once the weather warms up. Slowly keep them outside longer, exposing them to more and more direct sunlight over the course of a week or two. Then your plants will be ready to put in the garden. Once you put them in the ground, be sure to give them a long deep watering to get them all tucked in.
I hope these tips help you have the most successful vegetable this year yet!
