Pressure Canned Rabbit Vegetable Soup

Too much food! When I first started homesteading, I never thought I would have this problem, but right now we have so much produce coming in that I am overwhelmed! The easiest way to deal with excess is to freeze it, but our freezer is full to overflowing, so it is time to start canning. Canning is time consuming, and it can be a long process with a lot of steps depending on what you are making, but I can't tell you how wonderful it is to pull out a can of pre-prepped food to use later. I WILL remember to thank myself for all of this hard work later! 

I decided to use up some of the meat and vegetables in the freezer to can a chicken noodle soup- except we raise rabbits for meat (and chickens for eggs), so in this case it is a rabbit noodle soup. Also, canning noodles is a no no, so we also leave out the noodles and simply add them in when we are ready to eat it. So really we are canning a rabbit vegetable soup.

Here is what you need:

- 3.5 quarts chicken stock (I used homemade rabbit stock)

- 4 cups rabbit, chopped

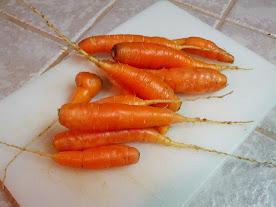
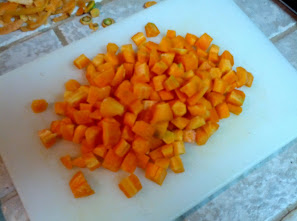
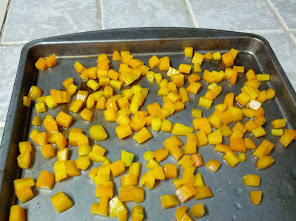
- 2 cups carrots, chopped

- 1 cup celery, chopped

- 1 cup onion, chopped

- 1 tsp salt

- 1/2 tsp pepper

- 1 tbsp garlic, minced

- 1 tsp basil (you can add whichever herbs you like)

Dump all of you ingredients into a large pot and simmer for about 20 minutes to blend all of the flavors together. This sounds quick, but all of that chopping takes time... 

Next use a slotted spoon to ladle the chicken and veggies into sterilized quart or pint jars. Fill each jar about halfway and then fill the rest of the way with broth, making sure to leave one inch of headspace in each jar. 

Put on the lids and rims, and process in a pressure canner for 75 minutes for pint jars or 90 minutes for quart jars. This recipe makes 4 quarts.


How to Freeze Fresh Carrots


I just picked the last of my fall carrots. Yes, I know it's May- good ole' mild Louisiana winters! I always plant the majority of my carrots in the fall. Some are ready by early winter, but others sprout late or just take forever to grow, so I let them stay over the winter and am rewarded with early carrots the next year (from January on). There were a few little scragglers left, so I pulled them all up and plan on dicing them up and freezing them for chicken pot pie! So here's how to freeze your own fresh garden carrots...


First wash the carrots well, peel them, and remove the tops. Next cut the carrots into whatever size or shape you are going to use them in. I will dice mine into quarter inch cubes for chicken pot pie, but you can slice them or keep them whole.


Now we will blanch the carrots. Blanching is a fancy word for boiling them in water for a few minutes to kill the enzymes in your vegetables that break down the nutrients over time. If you sliced or chopped your carrots, you will only need to blanch them for two minutes. For whole carrots, blanch for five minutes.


WHen they are finished boiling, strain the carrots and immediately plunge into ice water to stop the cooking as quickly as possible. Let them sit in the ice water bath for the same number of minutes that you blanched them for.


Finally, drain the carrots and lay them out in a single layer on a baking sheet. Put the baking sheet into the freezer for 12-24 hours until the pieces are individually frozen. This will help keep them easy to separate rather than freeze together in one giant clump. 


Put the pieces into a freezer ziplock bag, and you are ready for fresh carrots any time!

How to Freeze Fresh Strawberries


I love fresh strawberries in the spring! Unfortunately, like most berries, strawberries do not stay fresh for long. In order to enjoy them in salads and smoothies year round, I freeze them in gallon sized ziplock bags. Right now my freezer is literally packed with bags of strawberries, mulberries, and blackberries. I will probably eat just enough of them to make some room to add blueberries later next month. 

Freezing strawberries is very simple, but there is a process, so here it is!

First wash all of the strawberries thoroughly and make a "V" shaped cut in the top of each strawberry to take off the leaves at the top.


You can freeze the strawberries whole or sliced in a variety of ways, but I suggest slicing them in half lengthwise. This way they are still in big enough pieces to use on top of a cake or for dipping, but not so huge that they would take forever to chop up if I throw them in the blender for a smoothie. 


Lay out all of the strawberry slices on a baking sheet so that they do not overlap and put them in the freezer for 24 hours. This will allow each individual strawberry to freeze so you end up with a bag of separate berries instead of a giant frozen block of strawberries.


After waiting a day, simply put all of the strawberries into freezer ziplock bag and pull them out any time you want a taste of early summer!


How to Freeze Fresh Garden Shell Peas


The rain let up just long enough this week for me to rush to the garden and pick all the shell peas. While snap peas have edible pods, shell peas take longer to process into what you find in the freezer section at the grocery store. While we will eat some fresh, I always want to freeze some to enjoy later!

The first, and most time consuming part of the process, is to actually shell the peas. That's right, open up all those long green pods and scrape all the peas inside into a nice pile. It may sound tedious, but its not so bad to do on the back porch on a rainy day or while watching some TV in the evening. After all, I have to come in from the garden sometime...


Next, you are going to blanch the peas. This is a fancy word for what DH calls "flash boiling". You bring water to a boil on the stove, dump in the peas, and bring it back to a boil for two minutes. This process actually locks in the nutrients and taste so that they don't deteriorate during their time in the freezer.


After two minutes, drain the peas into a strainer.


Plunge the strainer into a bowl of ice water for about a minute to cool them quickly.


Lay the peas out in a single layer on a baking sheet and put it in the freezer for 24 hours. 


The next day store the peas in a labeled freezer ziplock bag, and use it whenever you want for almost just as delicious as fresh peas off the vine!