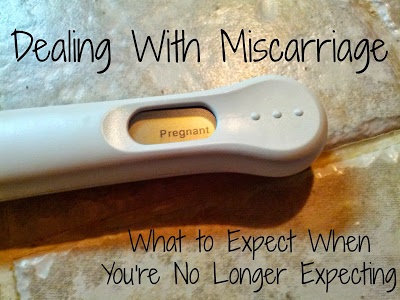
Dealing with Miscarriage: What to Expect When You're No Longer Expecting

I have read that 30-50% of all pregnancies end in miscarriage, most before women even know they are pregnant. I couldn't care less about this statistic until I became one of the 30-50%. If you are as well, it's time to talk. 

A little bit of my story...

My husband and I were so excited to find out that we were pregnant in March. I am a planner, and already had nursery colors picked out, top baby name choices, and yes, even the crib set up in the would-be nursery. We couldn't be happier to be new parents! At our nine week ultrasound, we got the news that every woman secretly fears every day of her pregnancy...there was no heartbeat. Devastation is the only word to describe the feeling. At the doctor's office they were running behind on the ultrasound appointments. They needed the room, and we were ushered out. And so began one of the most difficult seasons that I have ever had to walk through. If you are faced with a similar situation, I hope this helps.

What to Expect When You're No Longer Expecting

1. You Will Feel Very Alone Because No One Talks About it

Women do not talk about miscarriage, and I'm not sure why. Why do women wait to tell everyone that they are pregnant? Because they might have a miscarriage. Here's my question: so what? I am so grateful that I had told my family and close friends that we were pregnant before the miscarriage happened! How do you tell your mother, "I was pregnant, but I had a miscarriage." It was really nice to be able to rejoice with all of them for a time, and then let them share in the loss as well. 

The worst part about miscarriage is that you feel so alone, whether or not people know. Others wonder what you are still upset about, I mean, you've been crying about this longer than you were pregnant! When you are still dealing with the pain, they have forgotten that you were even expecting (if anyone even knew at all). And even those closest to you, like your husband, will be sympathetic but will not understand the emotions that you are going through.  You will feel like the only one in the world without a baby, but you're not. There are so many women who are experiencing the same emotional and physical roller coaster you are, but no one talks about it. 

It seems like after I had my miscarriage, almost everyone I talked to had had a miscarriage at some point as well. And some of their stories kept me from having pity parties- women who had 14 miscarriages in a row, lost their baby at 8.5 months, or who had three miscarriages and two stillborn children. Talking to women who had not only lived through such tragedies, but could also praise God for His provision through them were such a huge help for me. This is something we need to talk more about.


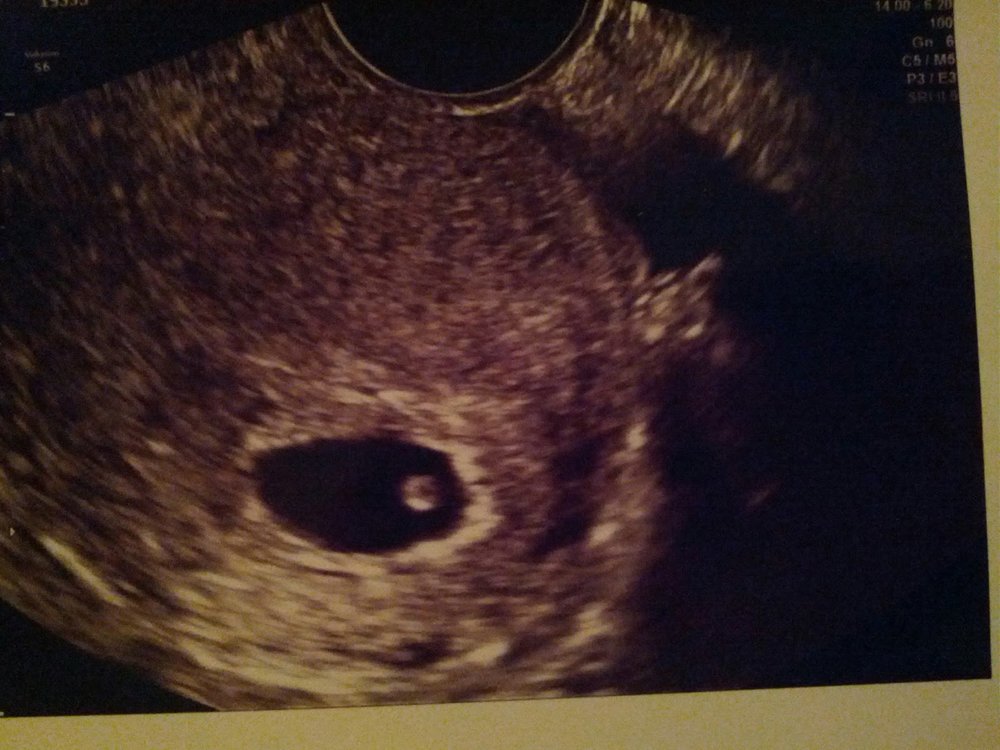
This is our 6 week ultrasound when baby was doing well.
This is the only photograph we have of our first child.

2. You Will be an Emotional Wreck

You will cry, a lot, and it's ok. Cry away! Months may go by, and you still see something randomly that makes the tears stream down your face uncontrollably. If it makes you feel better, you can blame the crazy amounts of confused hormones in your body (I know I do!). Whatever you are feeling, its ok. When you see yet another baby announcement on facebook, and you want to throw your laptop out a window, it's ok. When you see a newborn in the grocery store and start crying, its ok. When everyone around you seems to be progressing in life, and you are standing still, it's ok. 

A good friend of mine wanted to have lunch a few months after, and since we hadn't seen each other in several years, I just knew she was going to tell me she was pregnant. The whole way driving to meet her, I was physically sick to my stomach because I literally couldn't handle one more person's joyous news. She wasn't pregnant, thank goodness! And then I felt guilty for feeling that way, and you know what, it's ok. 

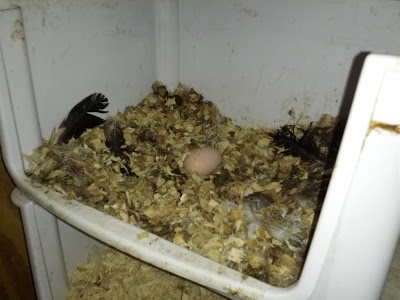
When I would try to keep the pain away, it would follow me into my dreams! One night I dreamed that I was walking along a road and saw a birds' nest in a tree with a mother bird sitting on three eggs. The nest fell out of the tree and the eggs broke on the ground. Immediately I fell to my knees with heaving sobs, crying uncontrollably, the kind of sobbing that comes from the stomach and you can't breathe. Everyone around was looking at me like I was crazy for crying over such a small thing. I woke up with that renewed feeling that you get after a really good cry. Take my advice- give yourself permission to cry a little every day, just don't let yourself stay there.

3. Others' Ignorance Will Cause You Pain

People who hardly know you will ask with a playful smile if you are expecting anytime soon. Why do they do that? Because they have no idea, that's why. It isn't their fault, but I have decided to NEVER ask this question to anyone. If they are expecting, and they wanted you to know, they would have told you. If they want a child, but are not expecting it is because they are dealing with something very painful, whether it be a miscarriage or infertility. People will ask you, and it always seem to be on the most inopportune days. You don't have to smile and answer like nothing is going on, but then again, you don't have to answer at all!


That was the happiest moment!!!

4. Mother's Day will Come

My miscarriage happened early in May, and the following week was Mother's Day. That was a tough day. I so desperately wanted someone to tell me, "Happy Mother's Day", to legitimize the fact that something real had happened! But at the same time, I was so afraid that someone might say something and I break into a thousand pieces and never recover. If you have had a miscarriage, you have the right to celebrate or not celebrate mother's day.You are a mother. You will always be a mother. And you have lost a child.


This is a painting my husband and I made
to announce our pregnancy to family and friends.
It is now a precious memory!

5. Your Body Will be Confused

I will not go into details here. Besides, I have a feeling it is different for everyone. But here's what I do know- your body will be very confused, and it will take a while to get back to normal. 

Your body is probably in shock, which is why it is doing crazy things right now, not to mention the huge amounts of hormones driving you half insane. Quit googling and call your doctor, they will help you know how to deal with whatever the issue is. This won't last forever. And if a male doctor tells you what kind of pain to expect during a miscarriage, keep in mind that he has no personal experience in this area.

6. It Will Shake the Very Core of What You Believe

Whatever you believe, having a miscarriage will call your faith into question. I am a Christian, and I take God at His word. In return, I follow Him with my life to the best of my ability. I had some people tell me that this was part of God's plan. I also had people tell me that my baby was looking down on me from heaven with angel wings playing a harp in a beautiful garden. I'm sure they meant well, but the Bible doesn't say either of these things.

Women having miscarriages was never God's plan! God's plan was perfect, and humans brought sin into the world in the Garden of Eden. As a result, we live in a fallen world and bad things happen, but this was never the plan. However, I do believe that God uses everything that we go through to shape us into people who look more like Him. James 1:3-4 says, "you know that the testing of your faith produces perseverance. Let perseverance finish its work so that you may be mature and complete, not lacking anything."

But what about the promise in Jeremiah 29:11? "For I know the plans I have for you,” declares the Lord, “plans to prosper you and not to harm you, plans to give you hope and a future." It occurred to me in this process that maybe my plan for me is not the same as God's plan for me. And then the true question- can I trust that God's plan is best and follow Him no matter what? Is Jesus enough? Truly enough? If I lose everything, not just this one thing, will I still trust and follow Him with joy? I wrestled with this question for months, and I think I will never know the answer to that question unless I am forced to by my circumstances in life. But for me, in this loss, the answer is yes! After all, God knows what it's like to lose a child.

God is not punishing you for something that you did wrong, the Bible says that he grieves with us, bottles up our tears, and will never leave our side. He never says that this life will be easy, in fact He promises the opposite! In John 16:33 Jesus says, "In this world you will have trouble. But take heart! I have overcome the world." Jesus promises that He will carry us through the hardships and that He is making all things new! The hope and future that He has for us is in heaven, not this world.

.

What now?

The first question I asked my husband after we found out, was "what do I do now?" How do you move on?

1. Take the Time to Figure Out What You Have Lost

This may seem simple to do, but in fact it is so much more complicated than I have even still figured out. This was our first child, and the list of loss to mourn is long. Obviously, you are mourning the death of a child. It is amazing how much you can miss someone that you never met, amazing how deep the loss of a child you were never able to hold in the first place. You will feel like a piece of you has died, and the empty hole it has left is so overwhelming. You are grieving the loss of knowing their gender, their personality, what they would have looked like, and all of the times you would have shared...you know, the ones you had already thought about in your mind with each passing week of pregnancy. First time holding them in the delivery room, first steps, first words, first day of school, learning to drive, getting married- you are mourning all of it at one time. 

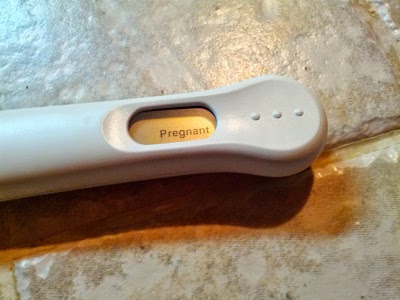
But you could be mourning so much more than that. For me as a first time mother, so much hope and anticipation was wrapped up in that plastic stick that announced the news. I have always wanted to be a mother, and I think that it is a miracle to carry a life inside of you. Releasing my "right" to be a mother, the hopes for this new life, the plans that I had for raising him or her is just as much a loss. Each person is losing something different.


The crib is still set up...

2. Take Time to Figure Out What You Have Gained

While you are experiencing loss on so many different levels, you will also gain some things, and have others to be grateful for. Make sure to make a list of those things as well. As this was our first, we are grateful to know that we can conceive. I am more grateful for life in general, and do not take this gift for granted. I am extremely grateful for an amazing husband who has been with me every step of the way, on the good and bad days, when I wasn't sure if I was crazy or sane. He will make a great father :) I am grateful for God's grace, that peace in the storm that is so reassuring that this is not the end, but a step along the way. Take time to appreciate the things that you wouldn't have noticed otherwise.

3. Look to the Future Without Forcing it

I wanted to get pregnant again as soon as possible. How better to recover from the pain than to experience the joy of new life again? Unfortunately, my body has taken a long time to recover, and I am realizing that it will take even longer to emotionally and mentally recover. Don't rush it. When the time is right...I know, it's cliche, but I am hoping that it's true. 

Know that getting pregnant again will not cancel out that the miscarriage ever happened. It will be a joyous day, but it will not take away the fact that you have lost a child. I have spent months waiting to finally be "over it", and I'm discovering that that day will most likely never come. I have yet to decide how to spend December 19, what would have been the birthday of our first born child, and I'm not sure if that day will ever be the same. There will always be a part of you that loves that child and misses them. Progress to healing will be slow- a few steps forward and a few steps back, but it will come. 

4. Lean on Jesus

It make take a while to come to terms with what you believe. I avoided spending time in the Bible for a while, and my prayers would bounce between being deep and vulnerable to being shallow and superficial. It will happen, but don't close out the One who does truly understand how you are feeling and has the power to give you peace in the midst of it. He does have a good plan for you, and He will carry you through this difficult time to show you what He has next. 


Blackberry Lemonade Recipe


On a hot summer's day, there is nothing more refreshing than a glass of blackberry lemonade! We picked seven pounds of blackberries from our backyard this spring, and thanks to this recipe, I'm pretty sure our frozen supplies will not last through the end of the summer.

Blackberry Lemonade Recipe:
4 cups water
1 cup sugar
1 cup lemon juice
1 cup blackberries (you can substitute blueberries if you like)
1 tbsp lemon zest (optional)

First mix 2 cups of hot water in a pitcher with the sugar. Stir until it is completely dissolved. Next, Put the blackberries in a food processor with 1 cup of water and blend very well. The longer you pulse the mixture, the better the seed will be able to separate from the pulp and settle to the bottom. 


Stir the blackberry mixture, lemon juice, and final cup of water into the pitcher with the lemon zest if desired. The blackberry seeds should settle to the bottom of the pitcher and not end up in your glass. If you want to strain them out, go ahead, but I'm too lazy!


All that's left to do is pour a big glass and enjoy!


Not too sweet and not too sour, this recipe will make a delightful way to end your summer days! Cheers :)

Grandma's Buttermilk Pancakes Recipe


We hand picked over 20 pounds of blueberries at a local blueberry farm this year. Most of them became blueberry jelly, but the rest we froze to use throughout the year. And the one thing I can't wait to use them for is homemade blueberry buttermilk pancakes!

There is nothing like Grandma's pancakes. There's just something so amazing about them that the box doesn't duplicate. Let's face it, when you eat the real thing, you know it! It turns out that making the real thing is just about as simple as using a box mix and well worth the effort! If you aren't convinced, I'll let the pictures do the persuading :)

Simply mix the ingredients in a bowl.

 Not too thick, and not too runny. Look at those juicy blueberries!

 Waiting for them to cook is almost unbearable...are they ready yet???

Mmm, perfectly fluffy and delicious from the inside out! This is making me hungry :)

Grandma's Buttermilk Pancakes Recipe: (makes 16)
2 c. flour (sifted)
1 tbsp. sugar
1/2 tsp. baking soda
1/2 tsp. salt

2 1/4 c. Bulgarian buttermilk
2 eggs (beaten)
2 tbsp. butter (softened)

Feel free to add some extras. My favorites include:
1 c. blueberries
1 c. chopped pecans
1 c. chocolate chips

Mix dry ingredients together. Mix in buttermilk, eggs, and butter. Stir together until smooth. Scoop 1/4 c. amounts onto a greased skillet on medium heat. They are ready to flip once bubbles come up through the batter.

What are your favorite "extras" to put in pancakes?

Perfect Backyard Vegetable Garden Plan: Feed Your Family Fresh!


Last year my vegetable garden was a 6" high raised bed that was 5' x 15'. It worked for a while, but the soil wasn't very deep since the bed wasn't as raised as much as I would have liked, and a nearby tree had grown so quickly that it blocked the afternoon sun to half of the garden which simply won't work for growing a harvest of summer vegetables. So last year I began designing my dream garden on paper, not really sure if it would ever become a reality. We dreamed big, but wanted to keep it as budget friendly as possible.

I used growveg to make my original garden design. I am absolutely in love with this software! It has made my gardening SO MUCH EASIER! As much as I like researching and charting, this makes the planning a dream! (try the 30 day free trial, and you'll know what I mean!) 

This was the plan for the spring 2014 layout. 28' x 20' with five raised beds in the center and a raised bed bordering the entire garden with 2ft. wide walkways except by the gate (3ft. to accommodate a garden cart for hauling mulch, etc.) for a total of 380 sq. ft. of gardening space.

To be ready for planting in the spring of 2014, we started working on the project during the late summer of 2013.

As always with gardening, the beginning is the most difficult part- so much work with not much to show for it. The first step was marking off the area and digging up the grass. We rented a sod cutter from Home Depot for $65. Worth. Every. Penny. It was still a lot of work, but nothing compared to doing an area of that size by hand.


Next we laid a thick layer of cardboard over the entire area. This is an inexpensive way to keep down weeds and keep the grass from growing back.


We framed up our five center raised beds using lumber we had gathered over time from the 90% off section at Home Depot. For the center beds we used cedar fence boards and for the outer edge beds we used a combination of landscape timbers and 2x4's. We ended up spending only about $30 for all of the wood needed.


Once the raised beds were framed up, we placed them in the layout and spaced them to accommodate walking space between each.

The chickens are very curious about what we are doing!

  Next we started filling the raised beds with compost and mulch. We wanted to avoid buying any dirt if at all possible, but it is difficult to fill over 500 cubic feet of area with your own backyard compost. We had been building up our compost pile for almost a year in anticipation and were able to fill the five center beds at once. 

You can see what used to be my vegetable garden in the foreground, and the new garden in the back.

Next we build a fence around the garden area to keep out the chickens. Very important! Chickens will eat up a vegetable garden as fast as it can grow! We used the pre-assembled picket fence panel from Lowe's. They cost $30 for an 8ft. piece. Instead of using concrete for the posts, we used the packed earth method around 4x4's and were really pleased with the stability of the outcome. We could have saved more money by going with a more rustic fence made of palettes, but I just like the look of a picket fence! We only needed 6 fence panels since we already had a hurricane fence on one side and the house on another. The fence, gate and hardware ended up costing about $200.


A family member had been getting rid of hundreds of these cement cylinders for free, so we laid them along the inside of the fence base to keep the dirt in and the grass and weeds out of the edge gardens.We were glad to get these for free!

Next we framed up the edge gardens and screwed them together to form the border beds. We hadn't built up enough compost since the last batch to fill these up. The Lafayette Utilities System offers free truckloads of mulch for gardening so we picked up a truckload of that to fill the edge gardens. While it is mulch that hasn't broken down completely yet, we were able to cover it with compost with some time to spare to help it break down into rich soil before we planted.


I put up chicken wire around the inside of the picket fence all the way around to keep out any critters that would want to squeeze between the fence boards. (chickens, *cough*) A 50' roll of chicken wire cost $25.


Originally I had used another truckload of mulch for the pathways, and was content to pull a few weeds growing between the gardens. 


That is, until I ran across a great find at a yard sale. A whole stack of bricks for $60! We spent the next three weekends laying bricks and now have brick pathways between the raised beds. If I had known that there would be bricks, I would have bricked first and built the gardens in after to make all of the dimensions fit together just right, but the few gaps we have give it character :)


Finally, the fun part! We put in all of our plants and began the work of growing, harvesting, and cooking! To go from a drawing on paper to the final product was amazing! We are so excited about how our new garden turned out. Soon I will be posting how we did on our harvest.

Here is the final breakdown of how much we spent:
Sod cutter rental: $65
Wood for raised beds: $30
Fence panels, posts, and gate hardware: $200
Chicken wire: $30
Bricks for pathway: $60
Final Cost: $385

A few more pictures of the finished result. It is hard to get a good picture of the whole garden in one...


Do you have a vegetable garden that you love???

Easy way to keep cats from digging up your plants


All of my neighbors have cats, and since we do not, our yard is the free territory that they all fight over. And when I get my gardens ready for planting seeds at the beginning of the season, I'm sure that my raised beds look like huge upscale litter boxes with the cats' names written all over them. There is nothing quite as frustrating as finding groups of cat potholes in a freshly planted seedbed. Even plants bought in six-packs don't stand a chance against a cat excavation.

After lots of different experiments, I have found a simple way that works really well! And it uses supplies that you probably already have sitting around your garden shed.

Simply take metal garden edging and lay it down flat over the soil. The seeds will grow up through the wide holes and the metal is too annoying for the cats to try to dig around.


 I already had some on hand from various gardening projects, and then I found some more marked 90% off at Hobby Lobby when they clearanced out the spring section. Love it when that happens! 


If you have a larger area to cover, cucumber trellises work really well. This wire trellis is just the right size for my raised beds.


As you can see, the plants simply grow up through the holes. Just remember to pull the trellis up before the plants get too big, or it will be stuck there until it is time to pull the plants up.


You can also use chicken wire that has wider holes. I have been using this method for a while now, and the cats will literally dig in the ONE SPOT that I don't cover. But all of my little seedlings come up right where they should :)

Do you have any other tips and tricks for keeping out the cats?

10 Reasons to Get Backyard Chickens (and 4 reasons not to)

10 Reasons to Get Backyard Chickens

1. Eggs!

The most obvious reason to get backyard chickens is that you get delicious eggs! There is nothing like country eggs (although ours are in the middle of the city...) and your own free range eggs that you know are pure and healthy are a huge incentive for having chickens. The eggs are the reason that we started some backyard chickens to begin with, but we had no idea how many other great reasons to have chickens we would discover along the way.

2. Chickens are low maintenance.

If you are interested in exploring self-sufficient living, chickens are an easy "gateway" animal. You build them a coop, give them some food and water, and let them run around and lay eggs. Pretty simple!

3. You can have chickens almost anywhere.

Even in the middle of the city, there is room for a small coop with a few laying hens. They do not take up much space, and most cities allow them. We allow our chickens to free range in our fenced in backyard, so they literally take up no extra space than we already had. 

Okay, so I don't recommend you keep them in the house, but they will sneak in if you leave the back door open on a nice spring day!

4. Chickens have a great personality!

I had no idea how much I would fall in love with our chickens! They each have names, come when they are called, are super sweet (love to be petted and held) and are more like pets than farm animals. They each have their own quirky traits, and we love to go in the backyard to just hang out with them in the evenings, laughing at their crazy antics.

The chickens were very curious about our new bunnies, and when the rabbit would hop, all the chickens would jump in the air, flap their wings, and squawk!

5. Chickens will replace your bug man.

If your chickens free range, they will keep your yard free of many unwanted pests. My chickens eat all kinds of bugs, and I have even seen them eating small garden snakes on several occasions. The chickens know to wait outside of the vegetable garden gate when I am in there because I will bring them all of the caterpillars I find on my plants. Less mosquitoes, love bugs, june bugs, caterpillars, and snakes? Fine with me!

Brandy Jr, my "gardening chicken", waiting outside the gate to the vegetable garden for me to bring her some caterpillars.

Brandy Jr. eating a big grub!

6. Chickens are natural weed and feed for your lawn.

You will not have to mow the grass as often. Living in Louisiana, our mowing season is usually from March through October (sometimes longer), and it is an every week thing unless you want your yard to look like a jungle. But now that we have chickens free ranging in the back yard, we cut that area half as often as the front! And for some reason, they like the weeds the best, so they go around eating the weeds first and naturally fertilizing the grass as they go. Now if only I could find an animal that does laundry and dishes!

7. Chickens are inexpensive.

So far this year we have spent $70 on chicken feed for our flock of seven laying hens, and we have gathered 68 dozen eggs! That is just about $1 for every dozen of fresh, free range chicken eggs. Anyone who has bought these at a farmer's market knows that $6/doz is a common price, so it is definitely worth it on the financial side! I'm not including the price of the coop or the chickens in this but even if I did include all of the start up costs (that we will benefit from for years to come), it still comes out to less that $4/doz.

Our first egg! What a day!

8. Chickens make a great garbage disposal.

I hate wasting food, but sometimes the leftovers just don't get eaten in time or the produce from your garden is half eaten by a caterpillar. I used to cringe as I threw away food, but now I smile as I toss it to the chickens, knowing that it will soon become eggs! My chickens eat anything and everything- bread, rice, vegetables, meat, yogurt, oatmeal, scraps that I throw in the compost pile- you name it! We have gotten into the habit of scraping our plates into a bowl to set out for the chickens, and they love it. Never waste food again!

9. Chickens can also be a source of home grown meat.

I understand that it is a big step to go from having laying hens to raising meat chickens, but once you get started, you may find it easier that you think. We stumbled upon this stage of backyard farming on accident when we ended up with five roosters in what was supposed to be a flock of hens. We obviously couldn't keep roosters in the city so we figured out how to turn them into gumbo. We were not disappointed :) Besides, organic chicken meat in the grocery store is expensive!

Did you say MEAT?!

10. Chickens are a stress reliever.

I'm not sure how to explain it, but there is something so calming and pastoral about sitting on the swing in the backyard watching the chickens peck around in the grass after a long day at work. Computer screens, emails, board meetings, and to do lists melt away as you reconnect with something REAL, something tangible. It lets your mind go back to something simple- life creating food that sustains life. Every now and then it helps to put the technology down and remember how the world works.

4 Reasons NOT to Get Backyard Chickens

1. They ruin gardens.

They like to dig, fling dirt and mulch everywhere, and uproot plants for fun. For people who love to garden like me, chickens and gardening do not mix. I finally solved this problem by fencing in the area of my yard that was for me (the gardens and patio) and the area that was for the chickens. Every now and then a chicken will get into the people part of the yard and trample down all of my tulips and I have to threaten to have chicken for dinner, but it works out well for the most part.

2. They can be loud.

There are lots of variables here- certain varieties are louder than others, some chickens simply have a loud personality, and sometimes chickens are loud in certain circumstances, such as when they are hungry, bored, annoyed at the neighbor's cat, etc. Also, they like to sing the egg song every time they lay an egg, or anytime any of them lay an egg. But you know, as long as it means eggs, I let it slide.

3. Chickens die, and that is very sad.

We have lost many chickens to neighbor's dogs, chicken hawks, and gape worm. You will become attached to certain chickens, and when you lose one of your favorites, it is very hard. The atmosphere of the whole flock can change. Be prepared to lose a few.

This was one of our favorites, Oreo, keeping my husband company while he had the flu. Our neighbor's dog got into our yard a few weeks later, and we lost her.

4. You have to find someone to feed them if you go on vacation.

Like most animals, they need someone to check in on them. While most people will dog sit, which is a pretty big responsibility, they feel a little strange about chicken sitting, even though it only requires filling up a feeder once a day and gathering the eggs.

Needless to say, for us the pros far outweigh the cons, and we love having chickens. I can't imagine our yard without them! Do you have any other reasons to add?

The Verdict on Eating Rabbit


It's time to give an update on our meat rabbit ventures!

I went from thinking that I could NEVER eat a cute furry rabbit, to raising a litter of our own adorable bunnies, to my husband processing them for meat, and finally ending up with a meal on the table.


I was skeptical about whether or not I would even like the taste of rabbit in general, much less when I knew how cute and sweet it was before it was on my plate. Everyone that I talked to about our intentions would ask with raised eyebrows, "Have you ever eaten rabbit?" And the answer was no, I had never even tried rabbit before we undertook this. From there I usually got one of two responses- they either loved rabbit and highly recommended it or thought it tasted gamey and tough and couldn't stand it. Which would I be???

We have now processed seven rabbits and eaten three of them, so here is what I have found so far and the experiments we have done.

The first rabbit we did not cook traditionally, but actually ground up (like beef) and used the rabbit as a ground beef substitute for half of the meat called for in my mom's tried and true spaghetti recipe. When we ate it, I couldn't tell a difference! Granted it was hiding, ground up in tiny pieces and mixed with half beef in a tomato-based sauce. I'm not convinced yet, but at least it's useful for something.


So we tried another rabbit, this time a whole rabbit cut into pieces and made into a French recipe- Honey Ginger Braised Rabbit with carrots. I adapted it to the crock pot and served it over rice (after all, I am from Louisiana and everything goes over rice). Once again, delicious! But was it just the strong ginger taste?


Finally, my favorite recipe so far- my husband made the rabbit the way his grandmother used to, cooked down into a Cajun Rabbit rice and gravy. Sooooo gooood! With three out of three winning recipes, I have made my decision...RABBIT IS DELICIOUS!

Not only is rabbit delicious, but it is also easy to raise, they multiply like, well, rabbits, they eat mainly leaves and grass, and it is one of the leanest meats. Seems like the verdict is pretty simple.

And with that I ready ready to raise another set of babies to bring home the bacon :) I have been completely won over, and now when I see our cute little rabbits, I see a scrumptious dinner!

How to Overcome the Evil Squash Vine Borer


I love the veggies in the summer garden from the cucurbit family: zucchini, squash, and cucumbers. But every spring when the first leaves of the seeds push up from the ground, I know the race is on. Can I get a good harvest from my garden before the Evil Squash Vine Borers destroy my entire crop of plants? It takes a lot of diligence to hold them off, but it IS possible. 

To overcome the enemy, you have to study them. They are most attracted primarily to summer squash and zucchini and occasionally to cucumbers, winter squash, and pumpkins. In my garden, they love them ALL!
They begin as these orange and black flying insects...they just look evil. 

You can try to stop them from laying their eggs on the plants by using row covers of mesh fabric. The only problem with this method is that the row covers also keep away the bees that are necessary for pollination for fruit production. I've never tried this method.

 
Once the flying insects lay their eggs at the base of the plant, the larvae hatch and bore into the stem of the plant. There is little evidence that they have taken up residence in your plants, but there is some. The first sign is an orange sawdust-like substance at the base of the plant where the borer entered. 


As the borer eats it way along the stem the leaves wilt. This is the time to catch them! If the borer goes unnoticed, it will eat its way all the way up (or down) the stem until it cuts off nutrients to the plant, and overnight the plant goes from a leafy green growth to a limp, flattened mess. Once this happens it is usually too late. 


Once you see the evidence of where the borer entered, take a knife and make a slice vertically along the stem until you find the nasty culprit, a white grub-like larvae.


I know it is hard to cut open the stem of your plant, but it will pay off in the end. If you catch the evil little grub then the plant has a chance of surviving even the worst damage. Cucurbits can regrow roots from any part of their stem, so simply bury the stem past the part where the damage was done and give it a good watering. The plant should be able to recover.


Once you have killed one, don't get too smug! They will be back, and back again, and yet again... They are persistent, so you have to be persistent too! Once they have bored to their hearts content, they dig down into the dirt, form a cocoon and wait to emerge as flying insects in the spring, so it is important not to let them get away.

Here are a few other tips to help keep them under control:
- Rotate plants so that you do not have cucurbits growing in the same area more than once every three years
- Immediately pull up and throw away (not compost) any plants that have been taken over by the insects
- Do not compost any cucurbits that may have been affected
- Plant multiple crops throughout the season so that in case one crop doesn't make it, you have a backup
- Use row covers during early plant development before they are flowering
- Thoroughly till the dirt after pulling up plants so that you expose the cocoons (you may even find some so you can squish them!)
- As plants grow, mound dirt around the exposed stem of squash and zucchini plants to keep them from being exposed
- Keep an eye on you plants, looking along the stem each day to find the early signs of orange sawdust and wilting leaves
- I know it hurts, but keep cutting along the affected stems until you find the perpetrators and then rebury the stems to promote new root growth

Good luck, and good harvest! Do you have any other tips or tricks that have worked?


Garden Fresh Basil Mint Pesto

Oh, how projects get started...Someone asked a question on one of the other posts about drying mint,
      ...which made me think about all of the mint in my garden that I haven't used ONCE yet this year
          ...which made me google what I could do with all this mint
               ...which is when I ran across a recipe for a pesto made with mint!


I get to use more basil and the mint at the same time? Score! The recipe also calls for sunflower seeds, and I just happened to have a sunflower ready to be harvested. Love it when that happens!


As you can see, the birds have already been munching on my sunflowers, and I was planning on giving the rest to the chickens. They will be disappointed that I found this recipe. So, I gathered the sunflower seed into a bowl.


The I harvested the mint and basil (making sure to pick extra as a treat for the rabbits- it is so easy to get side-tracked when playing in the garden). By the way, I do not recommend for anyone crack open all of the little sunflower seed shells to get the seeds out. It takes forever, and my fingers still hurt. Next time, I will give the sunflower seeds to the chickens and buy the seeds already shelled even though it was fun to use our own seeds.


The recipe goes together quickly and I love how it turned out. It uses very little oil, which makes it light, and the sweetness of the mint balances out the slightly bitter taste of the basil for a great combination!


If you want a pesto to use with pasta, I recommend the Basil Parsley Pesto, but if you are looking for a dip for crackers or veggie chips, this is the one!


I found the original recipe on the Meghan Telpner Nutritionista's blog, and then tweaked it a little.

 Basil Mint Pesto
1 1/2 cups fresh basil leaves
1 1/2 cups fresh mint leaves
1/4 cup sunflower seeds
1/4 cup pecans, toasted on 350 degrees for 10 minutes
3 garlic cloves, minced
2 teaspoons lemon juice
1/4 teaspoon salt


Mix all of the ingredients together in a blender or food processor. Yep, it's that easy!

What else do you use mint for???


How to Dry Fresh Parsley


My parsley is looking like it's about to bolt, so it's time to harvest what I can and dry it. It is a pretty simple process, and I keep it simple. No expensive dehydrators and no heating up the kitchen using the oven for hours. However, it does take time, so don't expect to use the parsley to cook anything today!


First take your handy garden clippers and snip off all of the stems that are ready to be harvested. Cut the stems all the way at the bottom of the plant, and work from the outside of the plant to the inside, leaving the newest leaves to continue growing for more produce later.


Wash the leaves off thoroughly and spin them in a salad spinner to get most of the water off. Hang them upside down in dry place that is out of the way, which for me is the laundry room.


The stems shrink when drying so if you tie them together they will probably end up falling on the floor. I use tape or office clips to hold mine together.


After a few weeks of drying (depending on the humidity) the parsley should be ready. Once the leaves are crunchy and dry take them off the stems and put them in the food processor. Chop, chop, and all done!


Once the parsley is chopped you will immediately know the difference between home-dried parsley and store bought parsley...the SMELL! I have bought and used a lot of parsley in my life, but it has never smelled even remotely as amazing as this! I'm pretty sure I can't go back to the store bought stuff now...

How to grow a year's supply of green onions for under $1


If more people knew this trick, the grocery store would quit selling green onions! I use a lot of green onions while cooking, and while each bunch is less that a dollar, it adds up over time. So how about buying one bunch and having it last all year? Or even for the rest of your life? I'm not exaggerating...


Next time you buy a bunch of green onions, cut off the white ends about an inch from the bottom. Place the bottoms in a glass of water until a few roots begin to grow. You will see the green onions regrowing literally within hours!

Once you see roots, transplant the green onions into a pot or the garden. As you need green onions, simply cut off the leaves about an inch above the level of the dirt. The plants will regrow to full size in a little over a week.


One time I didn't need any green onions for about a month and let them grow, when I finally harvested the leaves they were two feet long and the bunch weighed almost a pound! No problem, I just chopped them up and froze them in a gallon sized ziplock bag.


Since I'm gardening in zone 9, the green onions live year round! They even bloom in the spring, and if you leave the buds on the plants, they will drop their seeds and start a new crop all on their own. Now you know that one bunch from the grocery store is more than enough for the whole family!

Homemade Basil Parsley Pesto Recipe


Stop the madness! How can throwing a few seeds in an empty spot in the garden turn into my raised bed being overrun by basil?! 


Okay, so it's not all that dramatic, but I do hate to see anything go to waste, and I have been scrambling to keep up with the enormous harvest of basil that I have had this year. After drying much of it to use throughout the year, I still had more that I knew what to do with. 

I had looked at different pesto recipes, but most of them call for pine nuts, which are ridiculously expensive. If I have to spend that much money to be able to use up my fresh harvest from the garden, it kind of defeats the purpose. When I was sharing this problem with my mom, she shared her pesto recipe that doesn't use pine nuts! I'm not sure where she got it, but I'll share it with you :)


Homemade Fresh Garden Pesto
Ingredients:
2 cups fresh basil leaves loosely packed
2 cups fresh parsley leaves loosely packed
7 cloves garlic chopped
1 1/4 teaspoon salt
1 1/4 teaspoon pepper
1 1/2 cups olive oil

Puree all of the ingredients together in a blender or food processor. It will keep in the refrigerator for a few weeks, or you can freeze it to use when needed. If you do freeze it, make sure to let the mixture sit in the refrigerator for at least an hour before freezing. The recipe makes one pint jar.


I had more basil than parsley, so I used 3 cups of basil and 1 cup of parsley and it still turned out great. Also, I decided to freeze some of mine in an ice cube tray and then put the cubes in a freezer bag so that I could thaw the pesto in serving size portions. I can't wait to use this to make a chicken pesto sandwich or simply mix with spaghetti noodles for a refreshing summer meal. 

How do you make your pesto and what do you use it for?

How to Dry Fresh Garden Basil


Anyone who cooks a lot knows how expensive dried herbs can be, but gardeners know that herbs can be some of the easiest plants to grow in your backyard, especially if you have limited space or use container gardening. A great starter herb is basil. This spring I bought a pack of basil seed for a dollar, and it has taken off! So how do you transform your green leafy plant into the dried herb that you mix into spaghetti sauce?


First, you have to harvest the basil. You can cut back your plant multiple times throughout the season. In fact, each time you cut the plant back, the fuller it will grow back. Cut back the shoots of the plant two thirds of the way down before it begins to bloom. If there are any blooms beginning to form, be sure to pinch them off before you dry the leaves.


Make sure all of the leaves are dry and clean, and then hang the branches upside down in bundles. The stems will shrink as they dry, so if you hang them by wrapping a string or twist tie around the stems then the branches may fall out with time no matter how tight it starts out. What I do is use a zip tie and hang the branches on it at a strong split between the stem and a branch of leaves. This way, no matter how much the stem shrinks, none of my basil ends up on the floor. 


Hang the branches in a dark dry place, (I keep mine in the laundry room), and wait a few weeks. Once the leaves and dry and brittle, they are ready to be chopped up!


Remove each leaf from the branch making sure that the stems are broken off of each one. This takes some time, but no one wants to eat a stem, so its worth it. 


Put all of the leaves in the food processor, and chop away!


Store the herbs in an empty spice container (reused or bought from the store). Label it and you are ready to cook with the best tasting homegrown basil ever!

From my dollar packet of seed I have already harvested 10oz of dried basil so far and my plants are only halfway through the season. And that doesn't count all of the fresh basil that I have used to make pesto this summer. I plan to never buy basil from the grocery store again. 

What do you do with your summer basil?


Baby Rabbits! For meat???

Please don't think that I am a horrible person. If you had told me a year ago that I would be breeding meat rabbits, I would have laughed at you. I'm no bunny killer! Unfortunately, I have discovered that having a little urban homestead and seeing just how self-sufficient we can be on our own backyard is addictive.

We haven't bought eggs from the grocery store this year,
we haven't purchased chicken since last October,
we grow most of our own vegetables and some of our fruit,
so as we consider what we still buy but don't want to, I think of ground beef.

I'm too cheap to pay $7.50/lb for grass fed beef at the farmer's market, but it turns out that rabbits are a lean meat that is very healthy and and easy to raise in a small area. Besides, rabbits are quiet, create the best fertilizer for the garden, 90% of their diet can be greens from the yard, and they multiply like, well, rabbits. The meat can be stewed or ground up and used as a replacement for beef or chicken.

And that rationale was the reason that we bought a male and female New Zealand rabbit. At six months old we bred the rabbits and one month later we were thrilled to see seven little babies in the nesting box!

They are about a week old here, the fur is coming in, and the little ears are the only thing that makes them look more like a rabbit than a hamster.


After ten days they open their eyes for the first time to see and explore the world.


By two weeks old they are already eating greens from the garden on their own and learning to drink from the water bottle. 


At three weeks old we decided to let them play in the yard and meet our chickens. Our chickens were much more scared of the rabbits than the bunnies were of them, but they had a fun time playing together.


What I like most about having rabbits in general is that they are the best composters ever! I give them all of the leftover greens from my garden whether it is carrot and beet tops, finished plants that need to be pulled up, or even leaves and branches from tree and shrub trimmings. In return I get great fertilizer for the garden, and eventually meat as well. I love it when nothing goes to waste!


Look at that cute bunny! Could I ever eat that cute little bunny???

Our first set of babies will now be three months old in a week, and we have a new set of babies playing in the nesting box with mom. The usual age for rabbits to be processed is three months, and I think we will have the courage to go through with our plan of using this homestead investment for meat. I'll let you know how it goes!

What about you? Have you raised meat rabbits? Would you ever try?

How to grow your own garlic


I love being able to know where my produce comes from, and there is no better way than to grow it in your own backyard! One simple thing to grow in a small bed or even a container is garlic. All you need to get started is a clove of garlic from your grocery store. If you would like to grow organic garlic, then start with organic garlic.


Break the clove up into individual segments. 


Each segment will eventually grow into an entire clove of garlic. Keep the paper-like covering on the garlic segments, but peel back the covering from the very top of each so that the leaves can grow more easily.


Fold a paper towel in half length-wise and line up the garlic segments with the tops pointing up. Fold the bottom of the paper towel up to the top to create a little pocket. 


Roll up the paper towel and place it in a shallow glass with the tops facing up. Add just enough water to keep the paper towel wet without creating a puddle in the bottom of the glass.


After just a few days you will begin to see green shoots growing from the tops of each piece of garlic. In a few more days white roots will begin to grow through the paper towel to the bottom of the glass.


Then you are ready to plant! Bury each of the garlic deep enough to cover the entire garlic piece with the leaves sticking up. Plant the segments 6 inches apart in early fall or spring, and most varieties mature after 90 days. 


Happy planting and happy eating! Anyone have a favorite recipe using garlic???


EGG DAY!

We have been counting down for months...
We knew that the day was getting close...
The anticipation has almost been too much to bear...
But finally, EGG DAY IS HERE!!!!

As first time chicken owners, we have had our share of struggles getting started. From a total of 25 chicks that we began with, we now have 12 that have made it to adulthood. 

Meet Brandy Jr., our super lovable, very friendly, cuddly, and beautiful Buff Orpington. 


She has a pretty tragic story. She was one of our original flock of 7 Buff Orpingtons. Three of her sisters disappeared, some escaped under the fence to become snacks for predators and some were taken straight from the yard by birds of prey. She and three sisters survived the tough world or urban free ranging and had made it to their three month old birthday when a neighbor's dog dug under our fence and killed all of Brandy's sisters. There were feathers everywhere and it was such a devastating day to see our pets lifeless on the ground. We thought that the entire flock had been lost, but we soon discovered Brandy playing dead in the bushes! We had one baby left!


We have since started two new flocks of chickens, Americaunas and more Buff Orpingtons, and they have all flocked together but left out poor Brandy. She didn't really fit in with her new sisters. While they were skittish, she loved to sit with us and be petted. Far ahead of our other chicks, we counted down to Brandy's egg day for months! We had read about the signs, and she had them all- her comb and wattles were turning red, her hips were widening, and she was getting more vocal. Then we saw the tell-tale "egg squat" where she squatted down, lifted her tail and slightly spread her wings when petted. 

We made her a beautiful new nesting box and put in a ceramic egg. Six days after the first egg squat and at 22 weeks old, Brandy decided to plop down in the nesting box and get down to business. 
Right on time, you good girl!


Of course when it came time for her to choose a nesting box, she picked the disgusting plastic makeshift one we had put in there until the real ones were finished...


But who could complain when lo and behold, the first egg appears!!!!!


There is no feeling like a first egg! I hope Brandy feels accomplished, but not too overwhelmed- we have to do this again day after tomorrow!

So what did we do with the egg? Ate it that very day, that's what! I hear that the eggs get larger and more regular with time, but here is a comparison of a regular store bought egg to Brandy's handiwork.


I couldn't wait to see what the inside looked like. As you can see, the yolk is much darker in color that the pale yellow of store bought eggs. (That's where all the free ranging in my garden pays off). 


So you want to know...how did it taste??? Well, it tasted just as amazing as everything I could have hoped and dreamed :) Definitely worth the wait!


How to Make Sun Dried Tomatoes


Around this time of year there is an abundance of tomatoes coming from the garden, and sometimes you have to be creative to find ways to use them up before they spoil. A new recipe I tried this year is sun dried tomatoes!

You will need:
- Tomatoes
- Thyme
- Garlic powder
- Salt
- Pepper
- Extra Virgin Olive Oil

First cut the tops off of the tomatoes and then cut them into halves or quarters depending on the size of the tomato. Gently squeeze the tomato pieces so that all of the seeds and liquid seed cavities come out. Lay out the tomato pieces with the skin side down on a cookie sheet lined with aluminum foil. Sprinkle on top the garlic powder, salt, pepper, thyme and extra virgin olive oil.


While sun drying them would be nice, our Louisiana humidity would probably make them more wet than they started out, so we are going to dry them in the oven. Bake them on low heat at 200 degrees for 3-4 hours depending on how fleshy your tomatoes are. You can also do this in a toaster oven to use up less energy. When they are done the skins will look wrinkled and leathery, and they will shrink up to half of their original size.


 If you aren't going to eat them all immediately, you can can them. Place the tomato pieces in a mason jar and pack them in tight. Then pour extra virgin olive oil until the tomatoes are completely submerged. The jar must be refrigerated and will stay fresh for two weeks or can be frozen for up to three months.


These taste delicious on crackers, sandwiches, pizza or pasta. Or you can eat the straight on a slice of cucumber (especially if you have a lot of those to eat up as well!).

What recipes are your favorites foe eating up fresh garden produce?

How to grow MORE potatoes in a raised bed

I had a little extra garden space and wanted to try something new for the first time, so I bought a set of 6 seed potatoes on half price. If doing an experimental plant in the garden, the ones on clearance are less of a risk, even if they do get in the ground a little late :)

I planted them directly into the ground, but quickly learned that they grow well in containers where you can build the soil up around the stalks as they grow. The idea is that the more the plant is under ground, the more roots it can grow, and the more potatoes you will get. 


It was too late to transfer them into containers, so I took an old plastic pot that I had bought a shrub in and cut out the bottom of it. I then set it over the plants and filled it with dirt as the plants grew.


To make the experiment officially scientific, I left some of the potato plants alone to simply grow in the raised bed. At the end of the growing season, we'll see which type of growing conditions the potatoes like best!


Any predictions???

How to get rid of powdery mildew...ewww


I was so excited watching my squash plant growing, blooming, and starting little squashes. I couldn't wait to saute them up! However, as they started growing I noticed a recurring problem. The squash would get about an inch or two long before the end would turn black and shrivel up. 

I did a little research and learned that powdery mildew on the leaves is an indication that the plant has a fungus that effects the fruit production. I inspected the leaves, and sure enough...powdery mildew!


More research told me to use a fungicide to get rid of it, but I try to avoid chemicals (and spending money) as much as possible. I heard about some people using a skim milk and water solution to spray on the leaves for powdery mildew, so I thought I would give that a try.


All you need is Skim milk (I have heard that it MUST be skim, but I'm not sure why), water and a spray bottle. Simply mix 1 part skim milk to 6 parts water in a spray bottle and spray any leaves that show signs of powdery mildew.


After just a few days, the improvement was undeniable! All of the powdery mildew is completely gone! 


Now I am back to having a healthy squash plant and lots of yummy squash to eat.


Now that I knew about the powdery mildew, I started noticing it on other plants in my yard as well- camellias, sasanquas, zucchini and watermelon. I promptly sprayed every spot of it that I could find, and the skim milk solution worked on all of them as well!

I love it when I can use what I already have at home, especially when it works as well as what you would buy at the store. And all natural is even better!

What are your favorite garden home remedies???


How to Start Sweet Potato Slips


This year I am planting sweet potatoes in my summer vegetable garden. As always I am looking for the least expensive way to do it, so I decided to start my own slips instead of buying transplants. The process is SO easy, I just had to share. Here are the 4 simple steps:

1) Buy a sweet potato from the grocery store. If you want organic plants, then buy an organic sweet potato. Cut the potato in half and use toothpicks to suspend the cut end into a cup of water. 


2)  Place the cup in a warm sunny place. In a few weeks you will begin to see sprouts growing from the potato as you can see in the picture above. If the potato isn't sprouting, it isn't warm enough. Give it more heat and more time, and it will sprout.


After a few weeks you will see significant growth on your potato. Each potato can make 15-20 shoots and each of these will become a plant that yields 1-2 pounds of sweet potatoes!


3) Once the shoots are a few inches tall, twist each one off of the potato- this is your potato slip. Put all of your slips into a glass with their tips in water. Over the next week the slips will grow roots.


 4) Once your slip has a pretty good amount of roots, simply plant it in the ground once the weather is warm. I ended up with more slips that I had room for in the garden, but have heard that they grow great in pots, so now I have lots of container plants growing as well. 


Within just a week or two of planting, you will see the vines beginning to take over the garden!


The way I see it, you can't have too many sweet potatoes! I hope this helps you successfully grow a crop of your own. Do you have a different way of starting sweet potatoes? Please share!