DIY Rain Chain

Last weekend we put up gutters on the house and I wanted a creative and beautiful way to get the water from the downspout into the water barrel in my vegetable garden. What better than a rain chain? A rain chain is a decorative chain that directs the water down without too much splashing. Rain chains can be very expensive, but I'm bot inclined to spend much money garden decor... or anything really. So I began scrounging around the house for something that I could turn into a rain chain, and I found the perfect thing! 

Shower curtain hooks! 

I just happened to have two extra sets of shower curtain hooks in the back of a drawer. I think I got them at goodwill for $2 per set. You never know when you will need a set of shower curtain hooks, and it turns out that I needed them for this project!

They are perfect because they are metal, which means they are heavy enough to keep from blowing in the wind, they are made to go in the shower, which means they won't rust when wet, and they are hooks, which means it is really easy to link them together to make a chain.

This was really easy to make- it literally took about 15 minutes. I simply linked the shower curtain hooks together and used some wire to secure each connection so that they don't become disconnected in the wind (we do get hurricanes).  We hung it from the downspout and lined it up with the grate on the rain barrel.

I couldn't happier with the result! Not only is it beautiful and functional, but it also cost less than it would have to buy that ugly plastic down spout. Can't beat that!


Blanching Vegetables


As the summer ramps up and the garden produce starts rolling in, my kitchen becomes a place where I not only cook fresh produce, but freeze and can it as well. Some vegetables never produce enough, but there are always several that produce way more than we could eat fresh, so it's time to fill the freezer!

In order to freeze vegetables in a way that keeps the peak nutritional value and freshness, it is necessary to blanch them first. Blanching is like "flash boiling" vegetables to kill the enzymes that naturally break down vegetables over time.

Here are the basic steps for blanching vegetables:
1. Use the freshest vegetables that you can
2. Wash, peel, slice or dice your vegetables into the size and shape that you will want to use them in later
3. Bring a pot of water to a boil.
4. Add the vegetables to the water and bring back to a boil.
5. Start the time needed according to the chart when the water begins to boil.
6. When the time is up, strain the vegetables and plunge them into a bowl of ice water for the same number       of minutes that they boiled.
7. Strain the vegetables again and lay them out in a single layer on a baking sheet to dry.
8. Place the baking sheet in the freezer for 12-24 hours to freeze as individual pieces.
9. Put the vegetables in a freezer ziplock bag and label it with the date and contents.
10. Pull out of the freezer and enjoy any day of the year!

Different vegetables should be blanched for different amounts of time, so here is a handy chart to serve as a reminder!


How to Freeze Fresh Carrots


I just picked the last of my fall carrots. Yes, I know it's May- good ole' mild Louisiana winters! I always plant the majority of my carrots in the fall. Some are ready by early winter, but others sprout late or just take forever to grow, so I let them stay over the winter and am rewarded with early carrots the next year (from January on). There were a few little scragglers left, so I pulled them all up and plan on dicing them up and freezing them for chicken pot pie! So here's how to freeze your own fresh garden carrots...


First wash the carrots well, peel them, and remove the tops. Next cut the carrots into whatever size or shape you are going to use them in. I will dice mine into quarter inch cubes for chicken pot pie, but you can slice them or keep them whole.


Now we will blanch the carrots. Blanching is a fancy word for boiling them in water for a few minutes to kill the enzymes in your vegetables that break down the nutrients over time. If you sliced or chopped your carrots, you will only need to blanch them for two minutes. For whole carrots, blanch for five minutes.


WHen they are finished boiling, strain the carrots and immediately plunge into ice water to stop the cooking as quickly as possible. Let them sit in the ice water bath for the same number of minutes that you blanched them for.


Finally, drain the carrots and lay them out in a single layer on a baking sheet. Put the baking sheet into the freezer for 12-24 hours until the pieces are individually frozen. This will help keep them easy to separate rather than freeze together in one giant clump. 


Put the pieces into a freezer ziplock bag, and you are ready for fresh carrots any time!

How to Freeze Fresh Strawberries


I love fresh strawberries in the spring! Unfortunately, like most berries, strawberries do not stay fresh for long. In order to enjoy them in salads and smoothies year round, I freeze them in gallon sized ziplock bags. Right now my freezer is literally packed with bags of strawberries, mulberries, and blackberries. I will probably eat just enough of them to make some room to add blueberries later next month. 

Freezing strawberries is very simple, but there is a process, so here it is!

First wash all of the strawberries thoroughly and make a "V" shaped cut in the top of each strawberry to take off the leaves at the top.


You can freeze the strawberries whole or sliced in a variety of ways, but I suggest slicing them in half lengthwise. This way they are still in big enough pieces to use on top of a cake or for dipping, but not so huge that they would take forever to chop up if I throw them in the blender for a smoothie. 


Lay out all of the strawberry slices on a baking sheet so that they do not overlap and put them in the freezer for 24 hours. This will allow each individual strawberry to freeze so you end up with a bag of separate berries instead of a giant frozen block of strawberries.


After waiting a day, simply put all of the strawberries into freezer ziplock bag and pull them out any time you want a taste of early summer!


Houmas House Plantation Gardens

DH was so sweet to take me on a day trip to visit the Houmas House Plantation and Gardens outside of Baton Rouge for my birthday! I love touring old plantation homes- the history, the odd contraptions they used to solve problems we never think about today, and the large self-sufficient estates. But the Houmas House was so much more than a usual tour because of the incredible gardens, and of course, I'm a sucker for breathtaking landscaping because I can appreciate how much work goes into it!


I wish I had gotten better pictures, but I wasn't planning on blogging about the trip until later thinking back on how wonderful the visit was! So just know that these pictures do not do justice to the beautifully crafted jungle of plants that cover the grounds.

The main house has an 8 oak alley. It used to be 24 oak but most were destroyed to make way for a levee along the Mississippi River. The gorgeous oak trees are literally all over the property, setting the frame for the gardens. The oldest trees span in age from 300-600 years old.


The oak tree all the way to the left has what looks like a fancy bird house it in, but it actually houses a huge bee hive where they make their own honey to sell in the gift shop. Love that!


A central circular pond is surrounded by 4 quadrants of gardens that include the vegetable gardens, vine covered walkways, formal gardens, and water gardens.


There are formal gardens with the typical trimmed hedges, symmetrical lawns, and Greek statues.


 The formal gardens have nooks and crannies with quaint seating areas, and even the flower gardens are dotted with edible plants such as dill, artichoke, broccoli raab, cabbage, and kale.


Does this picture look familiar??? Look closely... 


That's right, it is Monet's Water Lilies and Japanese Bridge paining! It even has a Japanese tea house from the top, from which the view is even more of a likeness to the painting. To see this reinvention of the well-known painting is like seeing art come to life! This pond and waterfall is just one piece of the elaborate water gardens that have fountains, flowing streams, and waterfalls that flow into a seeing of pools and koi ponds graced with Louisiana irises and water lilies. Simply breath-taking!


The vegetable gardens were fascinating to me! They use all of the food that they grow in the vegetable gardens in the kitchen for use in the restaurants on the property, which I love. 


They had gotten 11 inches of rain the week that we visited, so you will notice the water still puddled between the rows of vegetables.


The trellises are all formed from intertwined branches and vines creating an artistic yet natural look.


While the vegetables have an overgrown, natural look to them with interplanted crops and curved rows forming a variety of shapes and designs, there is still a visible order and intentionality to the plantings.


I also recommend the tour of the house. The view of the gardens and the property from the second story balcony and fantastic!


Overall, I wish I would have taken a thousand more pictures! What I have are the few that I quickly snapped at the end. I guess that is the sign of truly living in the moment and enjoying it- being so present where you are that is doesn't occur to you to preserve it for later. I hope you have the chance to visit. You will not be disappointed!

How to Freeze Fresh Garden Shell Peas


The rain let up just long enough this week for me to rush to the garden and pick all the shell peas. While snap peas have edible pods, shell peas take longer to process into what you find in the freezer section at the grocery store. While we will eat some fresh, I always want to freeze some to enjoy later!

The first, and most time consuming part of the process, is to actually shell the peas. That's right, open up all those long green pods and scrape all the peas inside into a nice pile. It may sound tedious, but its not so bad to do on the back porch on a rainy day or while watching some TV in the evening. After all, I have to come in from the garden sometime...


Next, you are going to blanch the peas. This is a fancy word for what DH calls "flash boiling". You bring water to a boil on the stove, dump in the peas, and bring it back to a boil for two minutes. This process actually locks in the nutrients and taste so that they don't deteriorate during their time in the freezer.


After two minutes, drain the peas into a strainer.


Plunge the strainer into a bowl of ice water for about a minute to cool them quickly.


Lay the peas out in a single layer on a baking sheet and put it in the freezer for 24 hours. 


The next day store the peas in a labeled freezer ziplock bag, and use it whenever you want for almost just as delicious as fresh peas off the vine!

Swiss Chard Pesto-Salsa


I have a lot of swiss chard in my garden right now, which means its time to find a tasty way to eat it. After making this recipe, I am so glad that I grew swiss chard! 


So this isn't a pesto like you would use on pasta, but it also isn't a salsa that you would eat with chips. It's a delicious in between like a...palsa...or salsto. Either way, it has a surprising and fresh taste that goes perfect on quesadillas!


Swiss Chard Pesto-Salsa

Ingredients:
5-6 oz swiss chard (about half a bunch)
1/2 oz fresh cilantro
1 tbsp. minced garlic
1 tbsp. lime juice
1 tbsp. hot sauce (I used Homemade Hot Sauce)
2 tbsp. pepitas
1/4 cup olive oil

So simple to make! Wash and dry the swiss chard and cilantro, and then chop everything together in a food processor to the desired consistency. Keep refrigerated.


We decided to use our first batch of pesto-salsa in rabbit quesadillas, and they were delicious! I was too hungry to take a very pretty picture, but two tortillas stuffed with rabbit, grilled onions, cheddar cheese, tomatoes, and swiss chard pesto salsa made an excellent meal! I kind of felt like I was eating at a fancy gourmet farm to table restaurant. Well, a girl can dream :) Enjoy!

Garden Insects: Good Guys or Bad Guys?

You know the dilemma. You're playing in the garden, and there it is...a new bug. Is it a friend or foe? You don't have time to research it or look it up. You must decide- to squish or not to squish? 

There are no sure ways to tell whether a mystery insect is beneficial or a garden pest just by looking at it, but there are some general indications that can help you figure it out most of the time. Hopefully this chart with some general guidelines will help you know which bugs to squish and which ones to leave alone :)


Characteristics of Garden Pests

Good Bugs

1. They are Hunters
Usually good bugs are good because they eat other bugs, specifically the bad bugs. As hunters they will usually be sitting on a leaf, poised for attack. Their movement will be sly like a ninja with a swift attack on prey that comes near.

2. They are Loners
Usually hunters will hunt alone, not in big packs. They will be hiding most of the time, so they are sometimes difficult to spot in the garden.

3. They do not Play Favorites with Plants
SInce these bugs are after bugs and not after plants, you can find them on almost any and every plant in your garden. The wider their range of placement, the more likely they are to be good.

4. There is no Damage Left Behind
If you observe them closely, you should not see their mouth attached to your plant in any way. You also shouldn’t see any damage to the plants around them (unless it is left from the bug they just ate)

Bad Bugs

1. They are Gatherers
Bad bugs are there for the free salad bar. You have done a wonderful job growing something tasty and they thank you for the meal. They will eat and eat until they have enjoyed all the wonderful food that you grew for yourself. Free loaders!

2. They Come in Hoards
Most bad bugs flock together in huge groups, devouring an entire crop in record time, laying eggs and increasing in numbers until there is nothing left to ravage.

3. They are Usually Attracted to One Plant
Bad bugs often target a single type of plant. If all of the bugs in question are found only on any particular plant or family of plants, it is most likely a pest.

4. The Evidence is Clear
There are holes in leaves, droppings from the meal they gorged on your plants, wilted leaves, or vegetables with damage on them. Usually you will see the evidence of a bad bug long before you find the bug!

Hope this helps solve the mystery of that new bug in your garden!

Dealing with Trying to Conceive: What to Expect When You're Still Not Expecting

A little bit of my story...

A year ago today was one of the happiest days of my life: I found out I was pregnant with our first child! Six weeks later I had a miscarriage, and we were devastated. We never stopped trying, and I was sure that baby number 2 would not be far behind. But as the months continue to pass, I have learned that waiting can be just as devastating as losing a baby. Miscarriage is something not many women talk about, and trying to conceive is another category we keep to ourselves as women.

 I won't attempt to say that I know what every woman in this or that scenario is going through. I don't. We all deal with it differently. But if you can relate to this season of waiting, then I just want you to know that you aren't alone!

What to Expect When You're Still Not Expecting

1. Little Things Will Really Annoy You (a whole new set of pet peeves)

Babies are sweet and adorable, and you want one more than anything, so how can they seem to make you so angry? It won't be everyday, but some days, you will really dislike everyone who has a baby. But even more, you will get overly annoyed when someone complains about their kids. Or says that you are lucky not to have them. Or gets pregnant without trying. Or...well you get the idea. No one does these things to intentionally upset you, but it is a challenge to not take everything in the kids realm personally.

2. Social Media is not Your Friend

Facebook. Just don't go there. All those baby pictures...and baby bumps...and pregnancy announcements. And Google. Quit googling. I mean it! There is no secret position, food, vitamin, supplement, phase of the moon, etc. that will magically get you pregnant. Most forums offer false hope with strange one in a million scenarios that may not even be true. Oh, and resist the urge to pin baby stuff. I know that's a cute nursery color palette, but leave it alone.

3. You Could Win a Debate Championship With Yourself

Every little change in your body will become a sign. Going to the bathroom in the middle of the night, breaking out, being moody, etc. could mean that you are pregnant! But you try not to think about it, because you don't want to get yourself too excited just to let yourself down. Again. But then again, the signs are all looking up this time. This could be the month! But what if it really is nothing? There is no use in thinking about it for another two weeks until you can take the test. Two weeks! Torture...why can't I make myself stop debating with myself?

4. Your Calendar Takes on a Whole New Look

There is a lot to keep track of if you are charting cycles at all. You will create your own system of keeping up with all the symptoms: circles mean one thing, squares another, lines another, not to mention diagrams and numbers. What did I write in my calendar before? It is starting to look like a Pollock painting!

5. You Learn a Whole New Set of Acronyms

If you spend any time at all on TTC (trying to conceive) forums, you will quickly learn an entirely new language comprised of so many acronyms it will make your head spin! Anyone TTC using OPKs to detect O will debate on using FMU or how many DPOs to wait before using an HPT until AF visits. We're all just waiting for that BFP and the EWCM to BD. If you aren't sure what any of that means, just ask your OB-GYN! Unfortunately, reading forums will not get you pregnant, so don't overindulge. Besides, most of the comments are TMI.

6. You Will Have Bad Days and Good Days

Some days you will wake up and everything is great. You have a purpose today. If you never have a baby, you know that it will be just fine. You may have weeks of these days, or even months. But sooner or later, you wake up one day and it is not alright. You have waited and waited, you are doing everything right, and life is not fair. You get discouraged. Your friend's baby born long after you started trying is celebrating their first birthday, or second, or third. You can't make it one more day like this. Something has to give! Don't worry, something does give, and it will be the bad day. After some bad days you will wake up again one morning, and you will realize that it is another good day, and you are ok with life just the way things are. It would probably help my husband if there were some kind of meter to show him which day I am on, but I try to keep him up to date :)

7. You Will Have an Identity Crisis

What am I here for? What is the best way to use my time while waiting? Is there a reason that I don't have kids yet? Is there something that I am supposed to do first? Is there a kid out there already that is there for me to adopt? Is there something wrong with me? Am I broken? Am I inadequate? Am I not supposed to have kids? Or is it all just without purpose and the way things are? Am I okay with the possibility of never being a mom? How much longer will/ can/ should I wait? Sorry, I don't have the answers. Just questions. Lots of questions. My advice- ask the questions, but don't dwell on them too long. After all, I'm not sure I am ready to handle all of the answers.

What do I do now?

Ok, so you're waiting. Whether you are waiting actively or passively, time is passing, which means it must be filled with something. So what do we do with the time while we are waiting? This is a question I asked myself a year ago, and still find myself constantly asking. You know what you want to be doing, so what do you do in the mean time? As I tell the elementary students that I work with, you can either pout and miss out or change your attitude and get to play with the group. The time will pass one way or another, so let's choose to use it the best that we can!

1. Make Plans

I am a planner, which means I usually have all kinds of projects lined up. When you are trying to conceive, it is difficult to not base all decisions about future plans around possible due dates. The thought process goes something like this: "Do I want to teach a dance class? Well, if I get pregnant tomorrow, then I will be 4 months pregnant at the end. Can I teach dance while being 4 months pregnant?" There are so many things that I have said yes to over the last year that my hopeful calendar would have told me to turn down. I am so glad that I did not miss out on those experiences. Besides, keeping busy will help keep your mind off of what you are missing. So make plans! Take trips! Make commitments! And we can only hope that you will have a reason (like being pregnant) to cancel them later ;)

My husband and I took a trip to China! There is so much life to be lived!


2. Don't Count by the Month

I know that feeling. Month after month. Another failure. Another negative pregnancy test. It is easy to fall apart every month with the disappointment, but I would encourage you to use something else to keep track of the time. I used to mark time by the months, but each one was so discouraging. I still get discouraged, but now I wait until I get to the bottom of a bottle of prenatal vitamins. I can hold it together for 100 days until I take that last pill, and then have a day where I fall apart. I know it sounds strange, but find something longer term to use as a time keeper, and it will help you have a more positive outlook during the waiting.


3. Live in Today

I know you want a baby. I know you want the baby shower, the cute nursery, the life of being a mommy, but that is not your life today. Don't peruse the baby aisle at Target. Don't pin articles on making your own baby food. Resist the urge to buy that really cute preggo shirt that's on clearance. There will be a day and time for all of that, but it is not today. Today you are child-free. So go do something that can only be done today. Focus on what is happening around you here and now and let the future take care of itself.


4. Cancel the Pity Party

I am a really good hostess when it comes to pity parties, but let's fact it, they don't help. When I think about my situation and put it into perspective of what the average person in the world is going through, I quickly realize that I really have nothing to throw a party over. There are people starving, living in war torn areas, fighting cancer, and losing their families in tragic natural disasters. I live an amazing life- I just haven't been able to reproduce yet. It is a real struggle, but definitely not at the top of the list. Okay, I guess I can put away the party hats...


5. Choose Joy

My life is wonderful and I am blessed in so many incredible ways. So why is it that I get so focused on the one thing that I don't have instead of all of the things that I do? It is easy to get discouraged when I look at everyone with babies and me without one. But if I made a list of all of the amazing things that I have been blessed with while being completely undeserving, I could fill a book. Instead of putting my attention on what I don't have, I have to make an intentional effort to be thankful for the many blessings in life that I do have!


6. Keep the Faith

I don't know what your beliefs are, but I am a Christ-follower. Between the miscarriage and the waiting, my relationship with and faith in God has been tested. At the end of it all, here is what I know to be true- God loves me, He has a plan for me, and while this world will bring me trouble, He will work all things together for good for those who love and obey Him. I trust His timing and judgement because His thoughts are higher than my thoughts and His ways higher than my ways. 

God has given me all that I have, and it is His to take away. 

If I am never able to have a baby, I am made complete in Him. Nothing that happens to me changes those truths, and it is all that I can stand on when everything else gives way. I pray that you find that same certainty and peace! And when you have a bad day, come back to this truth and rest in it!

I don't pretend to have all the answers. Honestly, this list is as much to make a reminder for myself as it is to help anyone else. Whatever day you are having, and no matter how long you wait, know that you are NOT the only one. Keep your head up- there is a lot to be learned in the waiting. And who you are and become in the waiting is the truest reflection of your character. Make it beautiful rather than bitter!


Small Space Vegetable Garden Techniques: Intensive Gardening

If you are like me and have a small space for your vegetable garden, or just want to get more out of the space that you have, an easy way to fit more plants in less space is to change the arrangement. When it comes to the vegetable garden, it becomes a game to see if I can increase production each year by learning new techniques, and I can get a little obsessed with getting the most I can out of the area. That's when the diagrams come out to find the most strategic plant arrangement possible...


Traditional gardens use rows with unused garden space between each row of plants for walking. Unless you have a large garden area, the rows in between the plants wastes a lot of gardening area. An average 3x6 foot garden planted with the traditional row arrangement will fit only ten plants that all for 12 inch spacing.
Another method commonly used in raised beds and backyard vegetable gardens is the square foot gardening method. In this method, the gardener lays out a grid in the garden with each square in the grid measuring one square foot. Therefore, in a 3x6 foot garden, you would be able to fit 18 plants. While this arrangement is a much better use of space, there are still unused areas in the corners of each of the squares that are not utilized.

Intensive gardening still follows the suggested plant spacing of 12 inches, but staggers the rows of plants to make use of the lost corner space in square foot gardening. The spacing for plants in this arrangement are measured at an angle, allowing even more plants to fit in the area. This 3x6 garden will hold 23 plants that require 12 inch spacing! 

More plants means more produce, and more produce means more yield from the space that you have. This is just one of many ways to increase your yields, but it is a very simple technique to implement in the backyard vegetable garden. I hope you have a very productive vegetable garden this year!

Spring into Fruit Trees!

I love spring! First of all, the weather is so nice and warm- all of nature is bursting with new growth and energy and you can't help but join in by rolling up your sleeves to dig in the dirt. My vegetable plants go in the ground early, but the first signs of spring are in the fruit department. This always gets me excited, because every flower equals one fruit that I will get to harvest and eat later! 

Fruit is so expensive to buy, but so good for you! We go through a lot of fruit at our house. One of the best investments in our yard has been putting in fruit trees. They easily pay back your investment after just a couple of harvests but will keep producing for years and years. Currently in our yard we have 5 blueberry bushes, Crabapple, Fuji apple, Baldwin pear, Hood pear, grapevine, blackberry vines, Meyer lemon, satsuma, grapefruit, kumquat, and pomegranate. I know it sounds like a lot, but we enjoy them so much that we just ordered 3 more dwarf trees! Here are a few of my favorite sights in spring...


Our Balwin pear bloomed for the first time this year, which means we will get our very first harvest of pears in late summer/ early fall. Some little pears are already forming!

The mulberry was our first fruit tree. Here are some little berries on our mulberry tree. Mulberries don't technically bloom- they have little curly hairs on them for pollination purposes. I don't mind as long as the tree is covered!

Blackberries everywhere! So many little flowers with bees buzzing all around to pollinate each one. I have let the vines take over the entire back fence and we will probably get about 8 lb. of berries this year. I can already taste the summer berry smoothies :)


Satsumas (a kind of citrus) will have a heavy production year followed by a light one. This is our heavy year, and the tree is absolutely loaded with blooms.

I just love the little purple flowers on the lemon tree. So dainty and cute! And they smell like honeysuckle :)

Blueberry bushes don't have very showy blooms, but look like little white bells. Our bushes are still young, but put out a good amount of berries.

These pink Fuji apple blossoms make me smile. This is another tree that we will get our first fruit from this year. So exciting!

What is blooming in your garden right now? Anything promising some delicious treats later? I just love that I'll already be enjoying fresh fruit while my vegetables plants are just getting rolling. Hello, spring! It's been a while...

Canned Citrus Cranberry Conserve

I had some leftover cranberries in the freezer that I have been meaning to get to and finally had some time today! I had enough for two different canning recipes- a whole cranberry sauce and a cranberry conserve! In case you have never had a conserve before, it is a chunky spread that is a mix of fresh fruit, dried fruit, and nuts. They go great on pastries, cheese trays, or a garnish for meats.

What you need:

- 1 orange (with the peelings!), finely chopped and seeded

- 2 cups water

- 3 cups sugar

- 4 cups cranberries (fresh or frozen)

- 1/2 cup raisins

- 1/2 chopped pecans (can substitute other nuts if desired)

- Canning jars and lids and canning set

Combine oranges and water in a large sauce pan. Bring the water to a boil, then reduce the heat, cover, and simmer for five minutes until the peels soften. 

Add the cranberries, raisins, and sugar and stir until the sugar dissolves.

Return to a boil on medium high heat stirring constantly. Boil hard for 10-15 minutes until the mixture thickens. Remove from heat and do a gel test to see if it is ready. Stir in the nuts and continue to stir for 15 more minutes. Dip a spoon in and if the mixture sheets of instead of drips off then it is ready.

Ladle the mixture into sanitized jars leaving 1/4 inch headspace. Process jars in a water bath for 15 minutes. 

This conserve is sweet and tangy...just right!

Summer Herb and Veggie Quiche


I love this recipe for a summer quiche! It is so flavorful and goes perfectly with a fresh salad when you want a light, healthy, and garden fresh meal.

What you need:
- pie crust
- 1 bell pepper (green, red, or yellow), chopped
- 2 garlic cloves, minced
- 2 tbsp olive oil
- 2 tbsp. fresh basil (if you want to kick it up a notch, use lemon basil!)
- 4 eggs
- 1 cup milk
- 1 tsp. salt
- 1/2 tsp. pepper
- 2 cups cheddar cheese (or pepper jack, depending on your preference)
- 1/3 cup parmesan cheese
- 2 Roma tomatoes cut into 1/4 inch slices

Bake the pic crust at 425 degrees F for 10 minutes. Saute bell peppers and garlic in oil and stir in basil after 5 minutes.


Whisk eggs, milk, salt and pepper in a bowl. Stir in vegetables, cheddar cheese and parmesan. Pour the mixture into the pie crust.


Lay tomato slices on top of the mixture. Bake at 425 degrees F for 60 minutes. 


If you have more mixture than can fit in the pie crust, you can always use tortillas in muffin pans to make little snack sized versions!


I hope you enjoy the perfect blend of herbs, cheese, and fresh veggies in this great summer meal!


Planning your Chicken Flock for Year-Round Eggs


Chickens are animals, not egg laying machines. They don't lay year round and they don't lay forever, but there are ways to plan out the life cycle of your backyard chicken flock to give you better chances of getting eggs year round.

The egg laying cycle of a chicken goes something like this:
0-6 months: no eggs
6 months- 2 or 3 years- 3-6 eggs per week
Exceptions:
Molting- 4-6 weeks during the fall (usually October-November)
Winter- once the days get shorter, usually they don't lay again after molting until February. The only exception is with chickens that have just started laying- they will usually lay through the winter months during that first year.
Broody- depends on the chicken. Some will never be broody, some are broody constantly. Basically they sit in an empty nest box thinking they are hatching eggs...

There are unnatural ways to encourage laying in chickens during the winter months, like keeping a light on in the coop, but I prefer to give the ladies a break when they need one during the winter. After all, chickens have these cycles of rest for a reason. However, with careful flock management and planning, you can raise your chances of getting eggs year-round.

Older chickens will lay fewer and fewer eggs as time passes, and feeding chickens without getting fed as a result is not a good use of resources. And since new chicks will usually lay through their first winter, that is the key! We are putting a three-year plan into effect with our backyard flock, and it looks something like this...

For the sake of conversation, let's say that you have a flock of 10 backyard laying hens.

Year 1:
Buy five chicks in April of the same breed (actually probably get 6-7 because they hardly ever all make it to adulthood). These chicks will begin laying in October, lay through the winter, really ramp up egg production in the spring and then take their first rest in the fall of the second year.

Year 2:
Buy five chicks in April of a second breed, preferably that lay a different color egg than the first. These chicks will begin laying in October of the second year, just as the first group begins to take their rest for the winter.

Year 3:
Buy five chicks in April of either a third breed or the same as the first breed, once again that preferably lay yet a different color egg. These chicks will begin to lay in October as the first group finishes their second year of laying and the second group takes their first rest. As this group of chicks begins to lay in October, it will mark two years of laying for the first group, which means their egg production will have significantly slowed down. The first group of chickens will be retired (to the pot or freezer if you want to make the most of your investment).

Year 4 and forward:
Continue the cycle of buying new chicks each spring and retiring the oldest group of layers each fall to keep up optimum egg production in older hens, year-round egg production from the youngest hens, and a little meat every fall for chicken noodle soup or gumbo!

Many people start a flock of backyard chickens without considering that the group will go through its best production, as well as breaks, and finally slow down and stop laying all at the same time. Staggering the ages of your chickens will help even out the overall production of the flock over time. Also, using groups of chickens with different colored eggs will help you keep track of the production of each individual age group of chickens within your flock. I hope this helps you plan your long-term chicken flock!

Stuffed Cabbage Rolls


When I started my first little kitchen garden, I would get so excited anytime I could use something I had grown as an ingredient in something I was cooking. The more I have expanded the garden, the more grocery store ingredients have been replaced by homegrown and handmade ones. This recipe is a great example of making a meal with almost every ingredient straight from the yard! Oh, and they're delicious :) I hope you enjoy these savory stuffed cabbage rolls!

What you need:
- 16-20 large cabbage leaves (the ones on the outside of the head that you usually toss)
- 1 lb ground beef (or rabbit)
- 1 onion, chopped
- 2-3 carrots, chopped
- 1 cup cooked brown rice
- 1 tbsp dried parsley
- 2 tsp. salt
- 1/2 tsp. pepper
- 1 egg
- 24 oz. tomato sauce
- 1 tbsp. dried oregano
- 1/2 cup mozzarella (grated)

Steam the cabbage leaves on the stove- put the leaves in a few inches of water in a pot and cover with a lid for 10-12 minutes. While you're waiting for that, brown the ground beef, onion, and carrots. Once the ground beef is fully cooked add in the rice, parsley, salt, pepper, and egg.


Once the cabbage leaves are done, take them out and gently drain off the liquid. Use a knife to cut a "V" shaped slit in each leaf to remove the thickest part of the rib in each leaf. Next, scoop a few spoonfuls of the ground beef mixture onto the leaf.


Now tuck in the ends and roll it up! Place all of the cabbage rolls in a glass baking dish.


Next mix the tomato sauce and oregano together and pour it over the cabbage rolls. Cover it with aluminum foil and cook it in the oven for 90 minutes at 350 degrees (F). Right when you pull it out of the oven, sprinkle the cheese on top to melt and you're done! 


Delicious, garden fresh, and healthy stuffed cabbage rolls. I was able to use carrots, parsley, oregano, cabbage, and eggs all from our homestead. (If I had planned ahead a little better I could have also used rabbit meat, onions, and tomato sauce.) Now that's a meal I'm proud of! 

Top Ten Gardening and Homesteading Hacks


Here are my top ten all time favorite gardening and homesteading hacks! These simple tricks are too good not to share :) For more detailed info on any of these ideas, click on the links provided.

1. Add a goldfish to your rain barrel to keep mosquitoes from breeding. For ten cents it will eat all of the mosquito larvae and you never have to feed your goldfish!


2. When buying wood for homesteading projects, check the damaged and returned wood at Lowe's and Home Depot to get up to 90% off the sticker price.

3. Lay down decorative metal garden edging or cucumber trellises to keep cats and other animals from digging up seeds in freshly planted soil.


4. Put cardboard down in the bottom of raised beds to kill weeds and grass and then add the dirt on top. The cardboard will decompose allowing plants to root deep in the ground, but only after it has suffocated all of the weeds and grass beneath it.


5. Put a layer of heavy duty chicken wire a few inches off the ground as the base of a chicken run floor to allow chickens to "free range" without pecking the ground bare.


6. Take a 2 liter bottle with a small hole in the top and flip it upside down into the dirt to water plant roots directly and avoid losing water through evaporation in the heat of the summer.

7. Use a spray bottle filled with water to train chickens to BE QUIET!


8. Use a spray bottle with a mixture of skim milk and water to naturally get rid of powdery mildew on plant leaves.

9. For carrots and other small seeds that need to stay consistently moist for germination, plant the seeds, water them in, and then lay a wooden board over the area to keep the moisture from evaporating. Check under the board each day and remove once the seedlings sprout.

10. Use oatmeal, cayenne pepper, and garlic as a natural chicken dewormer.


I hope you enjoy these tips and tricks! Feel free to add your own in the comments!

How to "Free Range" Chickens in an Enclosed Run

We all know the benefits of free ranging chickens- higher egg nutrition, better chicken health, and lower feed costs just to name a few. However, there are also many reasons that people choose NOT to free range their chickens- protection from predators, city by-laws, or just trying to contain the mess or keep them out of the gardens. Is there a way to have the best of both worlds? Can you "free range" chickens in an enclosed run?

While this solution technically would not be considered free ranging, it does allow chickens to have access to dirt (where they can dig and dust bathe) as well as a limited, but constant supply of fresh greens to peck at. As you can see, this was a store bought coop and run (seen all the way on the back side. And built on to it is a large run. Normally just a few chickens would peck all of the grass from this run completely bare within days, not allowing any greens to grow back. 

In order to keep the greens growing, simply set up base of 2x4's around the bottom edge and lengthwise every few feet inside and put a layer of small square chicken wire across the entire bottom. I suggest a 1/4” or 1/2” hardware cloth. This allows the grass to grow up through the holes to be eaten by the chickens without pecking it bare. 

The poop falls through the grate to fertilize the grass, and rain also falls through to naturally water it. Make sure to leave the floor of part of the coop ungrated so that the chickens can also have an area to dig in the dirt and dust bathe.

Voila! Happy, healthy chickens in an enclosed coop with plenty of access to natural greens!


Places to go with Kids in Lafayette, Louisiana


I work with elementary-aged, at risk kids at a non-profit organization. We have a six-week day camp that costs them $25 per kid (total, not per day...), so you can imagine how creative we have to be to stretch the budget to make a memorable and amazing summer at the same time. When looking at the lists of "things to do in Lafayette" I am sometimes astounded at the prices. So here is a list of really cheap (or free) and fun things to do and places to go with a group (or a few) kids in Lafayette or within reasonable driving distance- just in time for summer planning fun! This list is great for groups, but also for moms who want to keep their kids engaged throughout the summer without breaking the bank.

They are numbered only because I like numbers- there is no special order.

For One or More Kids- This section is for all the moms out there!

1. Lafayette Science Museum and Planetarium- Lafayette
Our group rate came out to $1 per person. Can't. Beat. That. Most of the time the kids tire quickly of a museum, but we could have easily spent over two hours there. They have great interactive exhibits upstairs that the kids will love as well as a planetarium show.

2. Louisiana Old State Capitol- Baton Rouge
The Old State Capitol is free to tour and looks like a castle. My kids wanted to know when we would meet Cinderella :) It is a beautiful place to look around and they have a Louisiana history museum inside as well as a video, etc. There is also a beautiful lawn to eat a picnic lunch under the oak trees! The building is beautiful and it is completely free. They have a 3-D video experience available about the history of the building for $3 per ticket that I highly recommend. This is not your boring history film- be ready for a few fun surprises!

3. U.S.S. Kidd- Baton Rouge
Of you have a group of 20 or more the cost is only $4 per person to tour this battleship. However, right now they have the first Sunday of every month themed and the entrance is free! The kids LOVED it! It is like a huge metal playground. They crawled all over everything and couldn't possibly break anything even if they tried. The moveable metal turret guns were a favorite. We could have spent all day there, except there is no air conditioning, so go early before it gets hot. Metal ship + high temperatures = miserably baking. They also have a museum inside (with air conditioning) that is a must see so you can cool off on your way out.

4. Nature Station- Lafayette
All 4th graders take a field trip here, so make sure you take your kids before they hit 4th grade, that way the repeat trip will be on someone else's watch :) I have actually never been since I don't want to duplicate a trip for our older kids, but I have heard good things! They have hiking trails, presentations for groups, a kayak launch, etc. If your child is really into nature, they also have a young naturalists club.

5. Lafayette City Parks- Lafayette
Swimming! If you aren't a part of a gym that has a pool, then the city pools post their schedules at the end of May, and it only costs $1 per visit. Earl J. Chris in an indoor pool for rainy days and Girard Park is usually empty (plus they have a pond where you can feed the dicks, a great playground, and frisbee golf course). Different pools are open on different days and times, so be sure to check the schedule with the city.

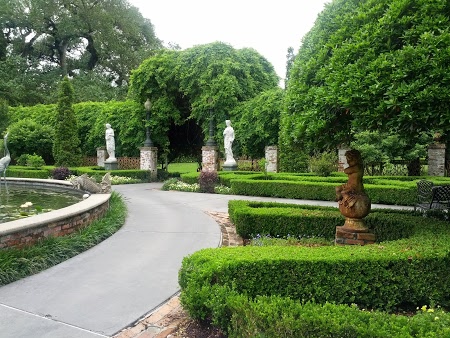
6. Ira Nelson Horticultural Center and Gardens- Lafayette
Most people have never heard of this place and pass by it every day! You can tour the greenhouse and gardens used by UL students to do plant and agricultural research for free. I'm not sure how big of a group you need to tour, but we didn't even take the tour and had a blast. We had our kids do a scavenger hunt to find certain flowers, vegetables, and other things in nature, and spent the whole afternoon exploring. They also have a childrens garden with themed beds and trivia questions for the kids to interact with.

7. Lake Martin and Cypress Island- Breaux Bridge
This is another great place for a scavenger hunt. They have a drive through the swamp where you can see alligators along the edge of the road (sometimes even in the road!) If you go in the spring you can see all of the birds nesting, which is pretty amazing. They also have a wooden plank walking tail over the swamp water so you can see the cypress tress, turtles, and egrets close up. They also have swamp boat tours from the dock, and that is the only part that costs anything at all!

8. Tabasco Factory Tour- Avery Island
This one is a bit of a drive, so I won't be taking my whole group anytime soon, but for a family trip it is perfect. The tour of the factory where you see how they make the pepper sauce is free as well as the gift shop, which has free samples of some crazy Tabasco products like Tabasco ice cream and Tabasco Coke. There are also some cool gardens that you can tour, but the price on that is $8 adult/ $5 child. This falls outside of our budget, but if it fits yours, it is a great way to spend the day.

9. FoodNet- Lafayette
A great way to spend time is giving back! Food Net is a great place to take kids because they can help pack the food boxes, sort canned goods and more! Call in advance to see when they can use an extra set of hands and teach your kids about helping others while having a great time. They also now have a FoodNet community garden that they may need help at. If you want your kids to learn about growing their own food, this is a great way to do it while helping others.

10. Movie Theater- Lafayette
The Grand movie theater usually shows already released movies during the day with special rates for kids (like $3 a piece). They put their schedule out as summer gets closer, so be sure to check it out. With the price of regular tickets, this is the only way I'll see the inside of a theater!

11. Public Library- Lafayette
Be sure to look at the public library's schedule of events. They always have TONS of free stuff going on for all age groups!

12. Local Fire Station
Bake cookies and deliver them to the fire station If you let them know in advance and there aren't any fires, you may get to see the fire truck or have an impromptu tour of the fire station.

13. Louisiana State Museum (Baton Rouge)
This museum is amazing! It is full of awesome stuff that will amaze the kids, and best of all it is free! It has a great visual and hands on exhibits including full size steamboats, combines, and mardi gras floats.

14. Cultural Activities
South Louisiana has a ton of cultural activities- so much so that I won't even try to list them all. However, there is always a festival, parade, or local event to attend if you keep an eye out!

15. Downtown Lafayette
I am just going to roll all of these activities up into one. Downtown Lafayette has a lot of family friendly activities include Movies in the Parc, Artwalk, and more. Some of these activities are on a regular basis and others are special events, so keep an eye on the calendar!

16. Be Creative
Take the kids to places they have never seen before. We took our kids to tour a bank once, and they were more impressed with the escalators and windows from the top of the tall building than the bank tour itself. Try going to the airport to watch planes take off and land. Pick fruit or vegetables at a local farm. Explore new areas of the city. There is always something new to see, and kids find the smallest things absolutely fascinating!


For Groups Only- Great for class or church trips

1. Great Harvest Bread Co. Tour and Bread Making- Lafayette
Great Harvest gives an awesome lesson on how bread is made, tour of their bread making facility, and let the kids make their very own bread creations complete with chef hats! Such a great experience for the kids!

2. Police Station Tour- Lafayette
The police station gives tours of the facility to the kids, and it can be a real eye-opener. The kids will get to see armored vehicles, drug dog training in action, drink driver testing, the police training facility and more. It is a great place to take a group for free.

3. KLFY TV-10 News Station Tour- Lafayette
A news station tour is great for the kids! Getting to play in front of a green screen was the highlight by far, but you also get to play on the news sets, see the behind the scenes of the filming and editing process, and sometimes meet some familiar faces from the news.

4. Bank Tour
Check at different places to see is you can schedule a bank tour. Our kids loved seeing the inside of a vault and will never forget seeing over $100,000 in cash! They got to see how the drive through worked with the tubes sending money in and out, etc. This is a great follow-up trip after talking about money or finances.

I know there are LOTS more, and I'm sure I will add to this later as I remember more. What else do you love to do with kids around Lafayette, LA on a budget???

Pressure Canning The BEST Spaghetti Meat Sauce


I believe that my mother's spaghetti sauce recipe is the BEST in the whole world. It was my favorite food growing up, and when I was first learning to cook on my own in college I thought mine would never turn out as good as hers. When it did, I was thrilled! Now it is also one of DH's favorite dishes year round. I have tried to freeze some on several occasions so that I can pull it out when I have a spaghetti craving, but it nevers turns out even close to the same (I really don't recommend it). So naturally, my mom's spaghetti sauce was the first recipe that I tried out in my new pressure canner! It turned out beautifully!

What you need:
1 lb. ground beef
2 cups onion
12 oz. tomato paste
8 oz. tomato sauce
4 cups water
3 tsp. salt
1 tsp. pepper
2 tsp. dried parsley
2 tsp. dried basil
2 bay leaves
2 tbsp. brown sugar

Cook the ground beef and onion until all pink is gone. Add all of the other ingredients, stirring well together. Cook on low for 45 minutes. 

Prepare your pressure canner and jars. Fill the jars with hot sauce mixture leaving 1 inch of headspace at the top. Cook in the pressure canner for 90 minutes with the pressure required for your altitude (10 lbs. pressure for 1,000 ft. or less).

This recipe is in increments of 1 lb. of ground beef. When I 4x the recipe it is just enough to make 7 quart jars of sauce, which exactly fills my pressure canner. Multiply the recipe by whatever number you need to make or can.

Now you can serve delicious, homemade spaghetti sauce with just a twist of a lid any time you have the urge! What an easy way for a quick homemade meal when you just don't have the time :)


How to Keep Mosquitoes from Breeding in Your Rain Barrel

We live in South Louisiana. I am convinced that sometimes it is humid enough here for mosquitoes to breed in the air! Ok, so it may not be that bad, but they definitely don't need much water to multiply quickly. We use several rain barrels around the yard for refilling the watering systems for the rabbits and chickens as well as watering our fruit trees and vegetable garden. While there are many fancy (and expensive) rain barrels that have mesh on top to keep mosquitoes out (and I'm not convinced that always works), we use mostly old trash cans with open tops to collect and redistribute water. This creates a huge problem for mosquito breeding! 

Thankfully we found a simple and inexpensive solution that has worked AMAZING! This will set your bank account back by around 10 cents. That's right, less than a quarter! Go to your local pet store and buy a goldfish or two and drop them in your rain barrel. The fish will eat all of the mosquito larvae, taking care of the mosquito problem as well as feeding the fish. We have had our fish in the rain barrels for over a year now. We have never fed them, and they have lived through even the coldest temperatures when the rain barrels were completely frozen over! If you want to get even cheaper, you can always catch some minnows and put them in there, just be careful that you don't scoop them out when you are getting water- they blend in a lot better than goldfish do!