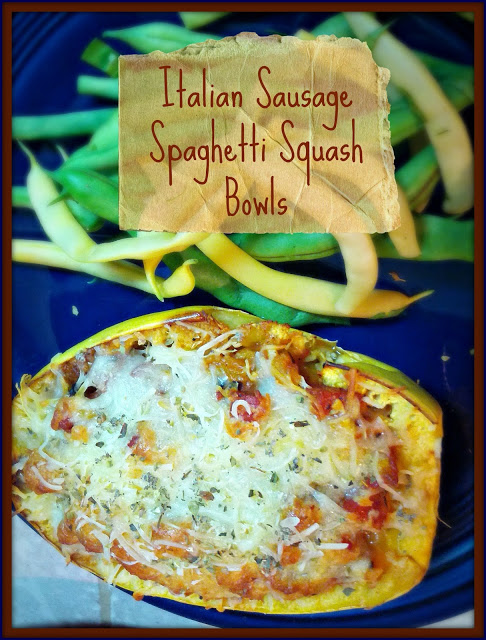
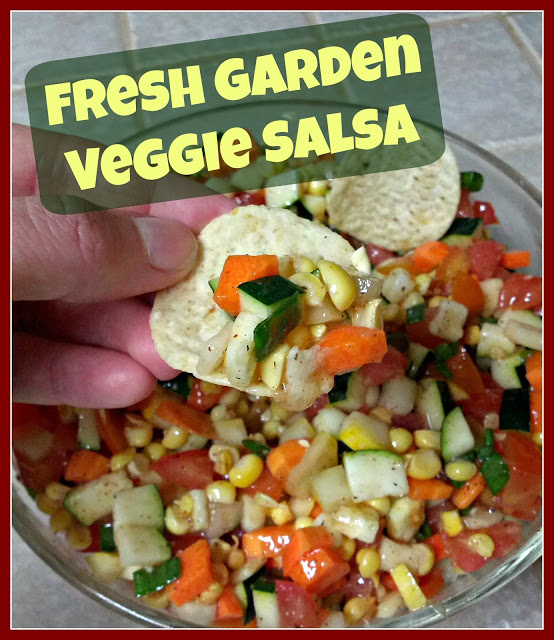
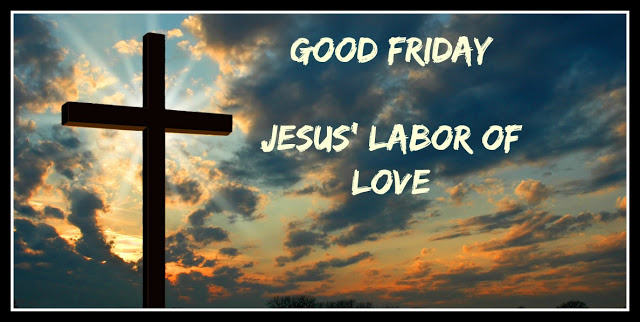
Good Friday: Jesus' Labor of Love

I am expecting a baby, and she could come any day now! This will be my first time experiencing childbirth, and as expected, I have some anxiety as I anticipate the event. My husband and I have taken child-birthing classes, and our desire is to have the baby without any interventions if possible. One of the things that we learned in our classes is that in order to cope with the pain, you must focus on the reward at the end. There was an acronym that I found helpful- P.A.I.N.

The "P" stands for purposeful. You are going through pain in order to accomplish an incredible task- birthing a new human being into the world!

"A" is for anticipated. You know that the pain is coming before it happens. You may not know the exact hour, but you know that this pain (which everyone claims is the most excruciating that a human can bear) WILL have to happen in order to bring your baby into the world.

"I" is for Intermittent. The pain will come and go, and there will be breaks in between so that you can bear it.

Finally, "N" is for normal. Could you imagine a baby squeezing out without there being pain? Not possible. Pain is a part of life, beginning with bringing that life into the world.

As I think about Good Friday and the sacrifice that Jesus made for us, I am struck by the similarities. In the past I have always marveled at the sacrifice that God made to give up His only Son for us, as I have repeated so many times in John 3:16, but today I think about Good Friday from Jesus' perspective. He was human just like I am. He knew His mission in leaving heaven and coming to earth was to save us. But that didn't make His task easy. There was only one way for Him to finish the job ahead of Him, and that was to focus on the reward.

Jesus knew that His pain was purposeful. His pain would bring about the redemption of all mankind from sin.

It was also anticipated. He knew in advance the kind of pain, both physical and emotional, that He would have to endure in order to complete His task. In fact, the thought of the pain filled Him with so much anxiety that He even prayed to God that there would be another way, any other way, to take away the pain and still finish the job, but it was not possible. He was so distressed that His sweat came out as blood!

His pain was intermittent- he would go through several beatings, trials, and betrayals with periods of time in between before the final crucifixion.

And finally, his pain was normal. Even though He was God, He still experienced the full pain of any regular human being throughout the process. He didn't have any super-human strength or supernatural pain management. He experienced it the same way you or I would.

You see, as a pregnant woman, I am not looking forward to the pain of labor. I have plenty of doubts about my ability to accomplish the task before me. I have prayed for an easy delivery! I have asked if there is another way to bring our little girl into the world without the pain. Unfortunately, I know that there will be pain, that it will be almost more than I can bear. However, one thought will help me push through to the end- the anticipation of meeting our daughter, of holding her in my arms, of gazing into the eyes of that precious face and beginning a relationship with her in her new life! That reward will make all of the pain pale in comparison.

In the same way, when Jesus went through His excruciatingly painful death, He could have called it off at any time! He could have called in legions of angels to save Him and stop what was happening. Instead, He had one thought on His mind that allowed Him to complete His task. And that thought was ME! It was YOU! He so desired a personal relationship with us and the opportunity to bring about new life that He literally faced Hell in order to give us that chance. He was thinking of us in the moment where He reached the end of Himself and love was all that could sustain Him- love for a sinful, undeserving people. I don't know why Jesus' death had to be so painful, but the parallel as I face labor is overwhelming and incredibly humbling for me. I feel so loved! SO cherished! And so undeserving... We truly are His children, He has birthed us in His blood! And at the end of it all, He considered us a reward that made the pain pale in comparison.

Pressure Canned Rabbit Vegetable Soup

Too much food! When I first started homesteading, I never thought I would have this problem, but right now we have so much produce coming in that I am overwhelmed! The easiest way to deal with excess is to freeze it, but our freezer is full to overflowing, so it is time to start canning. Canning is time consuming, and it can be a long process with a lot of steps depending on what you are making, but I can't tell you how wonderful it is to pull out a can of pre-prepped food to use later. I WILL remember to thank myself for all of this hard work later! 

I decided to use up some of the meat and vegetables in the freezer to can a chicken noodle soup- except we raise rabbits for meat (and chickens for eggs), so in this case it is a rabbit noodle soup. Also, canning noodles is a no no, so we also leave out the noodles and simply add them in when we are ready to eat it. So really we are canning a rabbit vegetable soup.

Here is what you need:

- 3.5 quarts chicken stock (I used homemade rabbit stock)

- 4 cups rabbit, chopped

- 2 cups carrots, chopped

- 1 cup celery, chopped

- 1 cup onion, chopped

- 1 tsp salt

- 1/2 tsp pepper

- 1 tbsp garlic, minced

- 1 tsp basil (you can add whichever herbs you like)

Dump all of you ingredients into a large pot and simmer for about 20 minutes to blend all of the flavors together. This sounds quick, but all of that chopping takes time... 

Next use a slotted spoon to ladle the chicken and veggies into sterilized quart or pint jars. Fill each jar about halfway and then fill the rest of the way with broth, making sure to leave one inch of headspace in each jar. 

Put on the lids and rims, and process in a pressure canner for 75 minutes for pint jars or 90 minutes for quart jars. This recipe makes 4 quarts.


Vine Peach Apple Butter

This is my first year growing vine peaches, and after lots of research trying to find recipes and having not much turn up, I decided to try a few concoctions myself. Vine peaches grow on a vine (very prolifically, I might add) in the summer, are the size of a small peach, bright yellow in color when ripe, and have a mild flavor. I had read that they can be used interchangeable with apples to make apple pie or apple butter.

And what better way to use my vine peaches than to make apple butter? I love making apple butter, and every time I can a batch, we eat through it in no time! It has the perfect mix of apples and cinnamon in a warm mash that makes me smile just to think about :) 

While vine peaches can be used interchangeably with apples in this recipe, I wouldn't use more than half as vine peaches because of their mild flavor (not quite as tasty as the granny smith apples) and they take a little longer to break down when cooking than the apples. If you don;t have any vine peaches, this recipe works just as well with all apples. In the picture below, you can see the size and color of the vine peaches in comparison to the granny smith apples.

Here's what you need:

- 4.5 lb. granny smith apples and vine peaches (combined- any ratio desired but I recommend more apples than vine peaches)

- 4 cups apple cider

- 2 cups sugar

- 1 1/2 tsp. ground cinnamon

- 1/2 tsp. ground cloves

- 1/2 tsp. ground all spice

- Canning jars and canning supplies

Peel, core, and cut the apples into wedges. For the vine peaches- peel, cut them in half, scoop out the seeds with a spoon, and cut into wedges. Boil the apples and apple cider on the stove for 30 minutes until tender. Puree the apples with a hand blender, or if yours is broken (like mine) the mixture should be soft enough to smash with a wooden spoon or potato masher.

Add in the remaining ingredients, bring to a boil, and simmer until your desired thickness (about an hour and a half). 

You can eat it as is and keep it in the refrigerator, or can it for later. Ladle the mixture into sterilized jars*. This recipe makes 3-4 pints.

*To sterilize jars, place them upside down in a boiling water bath for 10-15 minutes. After closing the jars, wait until they cool, and the lids should pop down in the center to show that they are sealed. If any of the jars don't seal, just put them in the refrigerator and use those first. Sealed jars should be good for up to a year.

Yep, it really is that simple! And I love the way it makes my house smell when I make this stuff. If only there were a way to bottle up this smell! I guess I will settle for caning the taste :)

Spaghetti Squash Italian Sausage Bowls


I successfully grew my first harvest of spaghetti squash this year, and I wanted to use the first two to make something really special, so I went out on a limb and tried a new concoction of my own! I usually don't take those kinds of risks with vegetables have have limited produce, but I am so glad I did. This recipe is downright delicious!

What you need:
- 1 lb sausage of your choice (I used some local Cajun sausage that was awesome!)
- 2 medium spaghetti squashes
- 1 tbsp olive oil
- 2 lb. tomatoes
- 1/2 onion, diced
- 1/2 tsp salt
- 1/4 tsp pepper
- 1/2 tsp sage
- 1/2 tsp thyme
- 1/2 tsp oregano
- 2 tsp basil
- 1 tbsp minced garlic
- 1 bay leaf
- 2 oz pepper jack cheese
- 1 cup mozzarella cheese


1. Slice the stem off of the spaghetti squash and cut them in half lengthwise. Clean out the "guts" of the squash with a spoon (feed the seeds and center to chickens if applicable :).

2. Brush the inside of the squash with olive oil, and place them cut side down on a baking sheet. Bake at 400 F for 30 minutes until the sides of the spaghetti squash can just be scraped into noodle form with a fork.


3. While the squash is cooking, cut the sausage up into tiny pieces (the size of diced ham) and brown in a skillet with a little olive oil.  Add the onion, thyme, oregano, sage, basil, salt, pepper and bay leaf while it browns.


4. While waiting for the sausage to brown, prep your tomatoes. Place the whole tomatoes in boiling water for 2 minutes until the skins split and then transfer them to a bowl of ice water for 2 minutes. Peeling the skin off should be a breeze at this point! Cut off the ends, peel them, and quarter them.

5. Add the tomatoes to the sausage and herb mixture on the stove and simmer for 10-12 minutes until the tomatoes break down a little to form a sauce. Add the garlic and pepper jack cheese. Stir in the cheese until it is melted.


6. Scrape out some of the "spaghetti" from inside each of the spaghetti squash bowls and set aside. Ladle the sausage and sauce to fill each of the bowls halfway. Add the "noodles" back in to each bowl and fill to the top with more sausage and sauce. Cover the top of each bowl with mozarella cheese and bake at 350 F for 20-30 minutes until the cheese on top is melted and has a touch of golden brown.


You can garnish with fresh herbs. We enjoyed ours with steamed bush beans with fresh lime basil. Can I just say it was beyond delicious?! Who knew that cooking from your back yard could feel so gourmet?


Homemade Taco Seasoning Mix


When I think about how much money I spend on those little packets on seasoning mixes, it makes me cringe. Not to mention that I don't really know what is in them. After looking at several recipes for DIY taco seasoning mix, I decided to give it a try and see if I could taste a difference. 

Here is what I discovered...
1) This stuff is so easy to mix together
2) The flavor is so much better that the packets!!!
I will not go back to the store bought stuff. Ever.


There are lots of seasoning combinations out there, but here's the recipe that I settled on.
What you need:
- 1 tbsp chili powder
- 1 1/2 tsp cumin
- 1 tsp salt
- 1 tsp pepper
- 1/2 tsp paprika
- 1/2 tsp oregano
- 1/2 tsp garlic powder
- 1/4 tsp onion powder
- 1/4 tsp cayenne pepper


Simply mix all of the ingredients together and store in an airtight glass container. Feel free to make several batches to fill whatever size container you use. Use 1-2 tbsp of mix per pound of meat depending on how seasoned you prefer it. Let me just tell you- you will taste a huge difference. This recipe is so packed with flavor! I just love finding better ways to do things, and less expensive with more flavor seems like a double win to me :)

DIY Mint Extract


Last spring I bought a few tiny mint plants and put them on the edge of a raised bed in my vegetable garden. I heard that mint grows easily...aka is very invasive and aggressively takes over everything. In the fall it was out of control and I pulled it all up. Or so I thought. It came back- this time growing between the bricks in the pathway. That's ok, I thought. It smells nice when I step on it, and it isn't taking up any garden space. Wrong. It has sent its runners into every adjacent garden and is now impossible to get rid of. So this morning I pulled a bunch up (1 lb. to be exact- yes, a full pound of mint, and that doesn't even put a dent in it) and decided to make something useful out of it.

Mint extract!

The process is very simple. 

1. Pull up the overwhelming amounts of mint taking over your yard.


2. Pull off all of the leaves that don't have brown spots or edges.

3. Wash the leaves and dry them using a salad spinner.


4. Put the leaves into a glass jar and crush the leaves to release their minty goodness. I used a butter knife to pierce and crush them.


5. Pour Vodka over the leaves until they are covered.  Seal the jar, give it a good shake, and place it in a cool dark place for six weeks (remembering to shake it every now and then).


6. Strain the leaves out of the mixture and use as you would mint extract bought from the store!

I am looking forward to mint shakes, ice cream, and cookies! But mostly, I am looking forward to reclaiming my garden from the encroaching mint takeover...


Fresh Garden Veggie Salsa


We all know that the most nutritious way to eat vegetables is raw, but I can only eat so many raw vegetables before getting tired of crunching. I also happen to have SO MANY fresh veggies coming in from the garden right now that I am having trouble making sure that none go to waste. And since I can only freeze and can for so long...here is a fantastically delicious way to enjoy all of those fresh garden veggies raw!

The best part of this recipe is that you can mix and match using almost any of the vegetables that you have available in the garden. I have made this recipe using all kinds of different vegetable combinations, and it always turns out addictingly delicious.


Here is what I used this time:
- 2 carrots, chopped
- 1 yellow squash, chopped
- 1 zucchini, chopped
- 1 large tomato, chopped
- 1 cucumber, chopped
- 2 small ears corn, cut from the cob
- 2 green onions, chopped
The Sauce:
- 1/4 cup Italian dressing
- 1 tbsp lime juice
- 1/2 tsp garlic salt
- 1/2 tsp pepper
- 1/2 tsp chili powder
- 1/2 tsp hot sauce
Chop all of the vegetables into small pieces so that they can easily fit on a chip. This step does take a while, but trust me, its worth it!

Mix the sauce together in a separate bowl, pour it over the vegetable combo, and mix well.

Now eat it with chips. Try not to eat the whole bowl in one sitting. It will be a challenge!

 The best part about this recipe is that you really can use whatever you happen to have around. Some other good ingredients that I have used and like are bell peppers, onions (white, yellow, or red), canned beans (rinsed well), and even some fruit such as mango or vine peach. The combination possibilities are endless! Enjoy :)


Spiced Carrot Zucchini Bread


Right now in south Louisiana I am in full garden harvest mode. I haven't had much time to post because there are so many projects going on. I am lucky just to keep up with all of the produce coming in from the garden much less made nice posts about it. I will try to do a better job in the future :) 

One of the downsides to canning is that you spend lots of time in the kitchen, but don't have anything to eat at the end of it. I know I will be glad that I canned all the tomatoes and pickles later in the year, but for now, I need some kind of edible reward after all this work in the kitchen! Here is a quick bread recipe to whip up that tastes awesome AND uses up some of the overwhelming amounts of garden produce rolling in to your kitchen.

What you need:
- 2 1/4 cups flour
- 1 cup sugar
- 1 1/2 tsp cinnamon
- 3/4 tsp baking soda
- 1/2 tsp baking powder
- 1/2 tsp salt
- 1/4 tsp ground cloves
- 3/4 cup chopped carrots
- 3/4 cup chopped zucchini
- 1/2 cup chopped walnuts (optional)
- 2/3 cup vegetable oil
- 1/2 cup milk
- 2 eggs, beaten


Spray a loaf pan non-stick cooking spray and preheat the oven to 350 degrees F. Combine all of the dry ingredients in a large bowl and then add in the remaining ingredients until well mixed. Pour the batter into the pan and bake for 60 minutes until cooked through. Let the loaf cool on a cooling rack and enjoy! 


The pictures on this did not come out great, but I don't mind so much because the bread came out AMAZING! You honestly can;t tell it has so many vegetables in it, but they make the bread come out very moist. The cinnamon and cloves give it just the right amount of spice to make it great for breakfast or dessert!

DIY Rain Chain

Last weekend we put up gutters on the house and I wanted a creative and beautiful way to get the water from the downspout into the water barrel in my vegetable garden. What better than a rain chain? A rain chain is a decorative chain that directs the water down without too much splashing. Rain chains can be very expensive, but I'm bot inclined to spend much money garden decor... or anything really. So I began scrounging around the house for something that I could turn into a rain chain, and I found the perfect thing! 

Shower curtain hooks! 

I just happened to have two extra sets of shower curtain hooks in the back of a drawer. I think I got them at goodwill for $2 per set. You never know when you will need a set of shower curtain hooks, and it turns out that I needed them for this project!

They are perfect because they are metal, which means they are heavy enough to keep from blowing in the wind, they are made to go in the shower, which means they won't rust when wet, and they are hooks, which means it is really easy to link them together to make a chain.

This was really easy to make- it literally took about 15 minutes. I simply linked the shower curtain hooks together and used some wire to secure each connection so that they don't become disconnected in the wind (we do get hurricanes).  We hung it from the downspout and lined it up with the grate on the rain barrel.

I couldn't happier with the result! Not only is it beautiful and functional, but it also cost less than it would have to buy that ugly plastic down spout. Can't beat that!


Blanching Vegetables


As the summer ramps up and the garden produce starts rolling in, my kitchen becomes a place where I not only cook fresh produce, but freeze and can it as well. Some vegetables never produce enough, but there are always several that produce way more than we could eat fresh, so it's time to fill the freezer!

In order to freeze vegetables in a way that keeps the peak nutritional value and freshness, it is necessary to blanch them first. Blanching is like "flash boiling" vegetables to kill the enzymes that naturally break down vegetables over time.

Here are the basic steps for blanching vegetables:
1. Use the freshest vegetables that you can
2. Wash, peel, slice or dice your vegetables into the size and shape that you will want to use them in later
3. Bring a pot of water to a boil.
4. Add the vegetables to the water and bring back to a boil.
5. Start the time needed according to the chart when the water begins to boil.
6. When the time is up, strain the vegetables and plunge them into a bowl of ice water for the same number       of minutes that they boiled.
7. Strain the vegetables again and lay them out in a single layer on a baking sheet to dry.
8. Place the baking sheet in the freezer for 12-24 hours to freeze as individual pieces.
9. Put the vegetables in a freezer ziplock bag and label it with the date and contents.
10. Pull out of the freezer and enjoy any day of the year!

Different vegetables should be blanched for different amounts of time, so here is a handy chart to serve as a reminder!


How to Freeze Fresh Carrots


I just picked the last of my fall carrots. Yes, I know it's May- good ole' mild Louisiana winters! I always plant the majority of my carrots in the fall. Some are ready by early winter, but others sprout late or just take forever to grow, so I let them stay over the winter and am rewarded with early carrots the next year (from January on). There were a few little scragglers left, so I pulled them all up and plan on dicing them up and freezing them for chicken pot pie! So here's how to freeze your own fresh garden carrots...


First wash the carrots well, peel them, and remove the tops. Next cut the carrots into whatever size or shape you are going to use them in. I will dice mine into quarter inch cubes for chicken pot pie, but you can slice them or keep them whole.


Now we will blanch the carrots. Blanching is a fancy word for boiling them in water for a few minutes to kill the enzymes in your vegetables that break down the nutrients over time. If you sliced or chopped your carrots, you will only need to blanch them for two minutes. For whole carrots, blanch for five minutes.


WHen they are finished boiling, strain the carrots and immediately plunge into ice water to stop the cooking as quickly as possible. Let them sit in the ice water bath for the same number of minutes that you blanched them for.


Finally, drain the carrots and lay them out in a single layer on a baking sheet. Put the baking sheet into the freezer for 12-24 hours until the pieces are individually frozen. This will help keep them easy to separate rather than freeze together in one giant clump. 


Put the pieces into a freezer ziplock bag, and you are ready for fresh carrots any time!

How to Freeze Fresh Strawberries


I love fresh strawberries in the spring! Unfortunately, like most berries, strawberries do not stay fresh for long. In order to enjoy them in salads and smoothies year round, I freeze them in gallon sized ziplock bags. Right now my freezer is literally packed with bags of strawberries, mulberries, and blackberries. I will probably eat just enough of them to make some room to add blueberries later next month. 

Freezing strawberries is very simple, but there is a process, so here it is!

First wash all of the strawberries thoroughly and make a "V" shaped cut in the top of each strawberry to take off the leaves at the top.


You can freeze the strawberries whole or sliced in a variety of ways, but I suggest slicing them in half lengthwise. This way they are still in big enough pieces to use on top of a cake or for dipping, but not so huge that they would take forever to chop up if I throw them in the blender for a smoothie. 


Lay out all of the strawberry slices on a baking sheet so that they do not overlap and put them in the freezer for 24 hours. This will allow each individual strawberry to freeze so you end up with a bag of separate berries instead of a giant frozen block of strawberries.


After waiting a day, simply put all of the strawberries into freezer ziplock bag and pull them out any time you want a taste of early summer!


Houmas House Plantation Gardens

DH was so sweet to take me on a day trip to visit the Houmas House Plantation and Gardens outside of Baton Rouge for my birthday! I love touring old plantation homes- the history, the odd contraptions they used to solve problems we never think about today, and the large self-sufficient estates. But the Houmas House was so much more than a usual tour because of the incredible gardens, and of course, I'm a sucker for breathtaking landscaping because I can appreciate how much work goes into it!


I wish I had gotten better pictures, but I wasn't planning on blogging about the trip until later thinking back on how wonderful the visit was! So just know that these pictures do not do justice to the beautifully crafted jungle of plants that cover the grounds.

The main house has an 8 oak alley. It used to be 24 oak but most were destroyed to make way for a levee along the Mississippi River. The gorgeous oak trees are literally all over the property, setting the frame for the gardens. The oldest trees span in age from 300-600 years old.


The oak tree all the way to the left has what looks like a fancy bird house it in, but it actually houses a huge bee hive where they make their own honey to sell in the gift shop. Love that!


A central circular pond is surrounded by 4 quadrants of gardens that include the vegetable gardens, vine covered walkways, formal gardens, and water gardens.


There are formal gardens with the typical trimmed hedges, symmetrical lawns, and Greek statues.


 The formal gardens have nooks and crannies with quaint seating areas, and even the flower gardens are dotted with edible plants such as dill, artichoke, broccoli raab, cabbage, and kale.


Does this picture look familiar??? Look closely... 


That's right, it is Monet's Water Lilies and Japanese Bridge paining! It even has a Japanese tea house from the top, from which the view is even more of a likeness to the painting. To see this reinvention of the well-known painting is like seeing art come to life! This pond and waterfall is just one piece of the elaborate water gardens that have fountains, flowing streams, and waterfalls that flow into a seeing of pools and koi ponds graced with Louisiana irises and water lilies. Simply breath-taking!


The vegetable gardens were fascinating to me! They use all of the food that they grow in the vegetable gardens in the kitchen for use in the restaurants on the property, which I love. 


They had gotten 11 inches of rain the week that we visited, so you will notice the water still puddled between the rows of vegetables.


The trellises are all formed from intertwined branches and vines creating an artistic yet natural look.


While the vegetables have an overgrown, natural look to them with interplanted crops and curved rows forming a variety of shapes and designs, there is still a visible order and intentionality to the plantings.


I also recommend the tour of the house. The view of the gardens and the property from the second story balcony and fantastic!


Overall, I wish I would have taken a thousand more pictures! What I have are the few that I quickly snapped at the end. I guess that is the sign of truly living in the moment and enjoying it- being so present where you are that is doesn't occur to you to preserve it for later. I hope you have the chance to visit. You will not be disappointed!

How to Freeze Fresh Garden Shell Peas


The rain let up just long enough this week for me to rush to the garden and pick all the shell peas. While snap peas have edible pods, shell peas take longer to process into what you find in the freezer section at the grocery store. While we will eat some fresh, I always want to freeze some to enjoy later!

The first, and most time consuming part of the process, is to actually shell the peas. That's right, open up all those long green pods and scrape all the peas inside into a nice pile. It may sound tedious, but its not so bad to do on the back porch on a rainy day or while watching some TV in the evening. After all, I have to come in from the garden sometime...


Next, you are going to blanch the peas. This is a fancy word for what DH calls "flash boiling". You bring water to a boil on the stove, dump in the peas, and bring it back to a boil for two minutes. This process actually locks in the nutrients and taste so that they don't deteriorate during their time in the freezer.


After two minutes, drain the peas into a strainer.


Plunge the strainer into a bowl of ice water for about a minute to cool them quickly.


Lay the peas out in a single layer on a baking sheet and put it in the freezer for 24 hours. 


The next day store the peas in a labeled freezer ziplock bag, and use it whenever you want for almost just as delicious as fresh peas off the vine!

Swiss Chard Pesto-Salsa


I have a lot of swiss chard in my garden right now, which means its time to find a tasty way to eat it. After making this recipe, I am so glad that I grew swiss chard! 


So this isn't a pesto like you would use on pasta, but it also isn't a salsa that you would eat with chips. It's a delicious in between like a...palsa...or salsto. Either way, it has a surprising and fresh taste that goes perfect on quesadillas!


Swiss Chard Pesto-Salsa

Ingredients:
5-6 oz swiss chard (about half a bunch)
1/2 oz fresh cilantro
1 tbsp. minced garlic
1 tbsp. lime juice
1 tbsp. hot sauce (I used Homemade Hot Sauce)
2 tbsp. pepitas
1/4 cup olive oil

So simple to make! Wash and dry the swiss chard and cilantro, and then chop everything together in a food processor to the desired consistency. Keep refrigerated.


We decided to use our first batch of pesto-salsa in rabbit quesadillas, and they were delicious! I was too hungry to take a very pretty picture, but two tortillas stuffed with rabbit, grilled onions, cheddar cheese, tomatoes, and swiss chard pesto salsa made an excellent meal! I kind of felt like I was eating at a fancy gourmet farm to table restaurant. Well, a girl can dream :) Enjoy!

Garden Insects: Good Guys or Bad Guys?

You know the dilemma. You're playing in the garden, and there it is...a new bug. Is it a friend or foe? You don't have time to research it or look it up. You must decide- to squish or not to squish? 

There are no sure ways to tell whether a mystery insect is beneficial or a garden pest just by looking at it, but there are some general indications that can help you figure it out most of the time. Hopefully this chart with some general guidelines will help you know which bugs to squish and which ones to leave alone :)


Characteristics of Garden Pests

Good Bugs

1. They are Hunters
Usually good bugs are good because they eat other bugs, specifically the bad bugs. As hunters they will usually be sitting on a leaf, poised for attack. Their movement will be sly like a ninja with a swift attack on prey that comes near.

2. They are Loners
Usually hunters will hunt alone, not in big packs. They will be hiding most of the time, so they are sometimes difficult to spot in the garden.

3. They do not Play Favorites with Plants
SInce these bugs are after bugs and not after plants, you can find them on almost any and every plant in your garden. The wider their range of placement, the more likely they are to be good.

4. There is no Damage Left Behind
If you observe them closely, you should not see their mouth attached to your plant in any way. You also shouldn’t see any damage to the plants around them (unless it is left from the bug they just ate)

Bad Bugs

1. They are Gatherers
Bad bugs are there for the free salad bar. You have done a wonderful job growing something tasty and they thank you for the meal. They will eat and eat until they have enjoyed all the wonderful food that you grew for yourself. Free loaders!

2. They Come in Hoards
Most bad bugs flock together in huge groups, devouring an entire crop in record time, laying eggs and increasing in numbers until there is nothing left to ravage.

3. They are Usually Attracted to One Plant
Bad bugs often target a single type of plant. If all of the bugs in question are found only on any particular plant or family of plants, it is most likely a pest.

4. The Evidence is Clear
There are holes in leaves, droppings from the meal they gorged on your plants, wilted leaves, or vegetables with damage on them. Usually you will see the evidence of a bad bug long before you find the bug!

Hope this helps solve the mystery of that new bug in your garden!

Dealing with Trying to Conceive: What to Expect When You're Still Not Expecting

A little bit of my story...

A year ago today was one of the happiest days of my life: I found out I was pregnant with our first child! Six weeks later I had a miscarriage, and we were devastated. We never stopped trying, and I was sure that baby number 2 would not be far behind. But as the months continue to pass, I have learned that waiting can be just as devastating as losing a baby. Miscarriage is something not many women talk about, and trying to conceive is another category we keep to ourselves as women.

 I won't attempt to say that I know what every woman in this or that scenario is going through. I don't. We all deal with it differently. But if you can relate to this season of waiting, then I just want you to know that you aren't alone!

What to Expect When You're Still Not Expecting

1. Little Things Will Really Annoy You (a whole new set of pet peeves)

Babies are sweet and adorable, and you want one more than anything, so how can they seem to make you so angry? It won't be everyday, but some days, you will really dislike everyone who has a baby. But even more, you will get overly annoyed when someone complains about their kids. Or says that you are lucky not to have them. Or gets pregnant without trying. Or...well you get the idea. No one does these things to intentionally upset you, but it is a challenge to not take everything in the kids realm personally.

2. Social Media is not Your Friend

Facebook. Just don't go there. All those baby pictures...and baby bumps...and pregnancy announcements. And Google. Quit googling. I mean it! There is no secret position, food, vitamin, supplement, phase of the moon, etc. that will magically get you pregnant. Most forums offer false hope with strange one in a million scenarios that may not even be true. Oh, and resist the urge to pin baby stuff. I know that's a cute nursery color palette, but leave it alone.

3. You Could Win a Debate Championship With Yourself

Every little change in your body will become a sign. Going to the bathroom in the middle of the night, breaking out, being moody, etc. could mean that you are pregnant! But you try not to think about it, because you don't want to get yourself too excited just to let yourself down. Again. But then again, the signs are all looking up this time. This could be the month! But what if it really is nothing? There is no use in thinking about it for another two weeks until you can take the test. Two weeks! Torture...why can't I make myself stop debating with myself?

4. Your Calendar Takes on a Whole New Look

There is a lot to keep track of if you are charting cycles at all. You will create your own system of keeping up with all the symptoms: circles mean one thing, squares another, lines another, not to mention diagrams and numbers. What did I write in my calendar before? It is starting to look like a Pollock painting!

5. You Learn a Whole New Set of Acronyms

If you spend any time at all on TTC (trying to conceive) forums, you will quickly learn an entirely new language comprised of so many acronyms it will make your head spin! Anyone TTC using OPKs to detect O will debate on using FMU or how many DPOs to wait before using an HPT until AF visits. We're all just waiting for that BFP and the EWCM to BD. If you aren't sure what any of that means, just ask your OB-GYN! Unfortunately, reading forums will not get you pregnant, so don't overindulge. Besides, most of the comments are TMI.

6. You Will Have Bad Days and Good Days

Some days you will wake up and everything is great. You have a purpose today. If you never have a baby, you know that it will be just fine. You may have weeks of these days, or even months. But sooner or later, you wake up one day and it is not alright. You have waited and waited, you are doing everything right, and life is not fair. You get discouraged. Your friend's baby born long after you started trying is celebrating their first birthday, or second, or third. You can't make it one more day like this. Something has to give! Don't worry, something does give, and it will be the bad day. After some bad days you will wake up again one morning, and you will realize that it is another good day, and you are ok with life just the way things are. It would probably help my husband if there were some kind of meter to show him which day I am on, but I try to keep him up to date :)

7. You Will Have an Identity Crisis

What am I here for? What is the best way to use my time while waiting? Is there a reason that I don't have kids yet? Is there something that I am supposed to do first? Is there a kid out there already that is there for me to adopt? Is there something wrong with me? Am I broken? Am I inadequate? Am I not supposed to have kids? Or is it all just without purpose and the way things are? Am I okay with the possibility of never being a mom? How much longer will/ can/ should I wait? Sorry, I don't have the answers. Just questions. Lots of questions. My advice- ask the questions, but don't dwell on them too long. After all, I'm not sure I am ready to handle all of the answers.

What do I do now?

Ok, so you're waiting. Whether you are waiting actively or passively, time is passing, which means it must be filled with something. So what do we do with the time while we are waiting? This is a question I asked myself a year ago, and still find myself constantly asking. You know what you want to be doing, so what do you do in the mean time? As I tell the elementary students that I work with, you can either pout and miss out or change your attitude and get to play with the group. The time will pass one way or another, so let's choose to use it the best that we can!

1. Make Plans

I am a planner, which means I usually have all kinds of projects lined up. When you are trying to conceive, it is difficult to not base all decisions about future plans around possible due dates. The thought process goes something like this: "Do I want to teach a dance class? Well, if I get pregnant tomorrow, then I will be 4 months pregnant at the end. Can I teach dance while being 4 months pregnant?" There are so many things that I have said yes to over the last year that my hopeful calendar would have told me to turn down. I am so glad that I did not miss out on those experiences. Besides, keeping busy will help keep your mind off of what you are missing. So make plans! Take trips! Make commitments! And we can only hope that you will have a reason (like being pregnant) to cancel them later ;)

My husband and I took a trip to China! There is so much life to be lived!


2. Don't Count by the Month

I know that feeling. Month after month. Another failure. Another negative pregnancy test. It is easy to fall apart every month with the disappointment, but I would encourage you to use something else to keep track of the time. I used to mark time by the months, but each one was so discouraging. I still get discouraged, but now I wait until I get to the bottom of a bottle of prenatal vitamins. I can hold it together for 100 days until I take that last pill, and then have a day where I fall apart. I know it sounds strange, but find something longer term to use as a time keeper, and it will help you have a more positive outlook during the waiting.


3. Live in Today

I know you want a baby. I know you want the baby shower, the cute nursery, the life of being a mommy, but that is not your life today. Don't peruse the baby aisle at Target. Don't pin articles on making your own baby food. Resist the urge to buy that really cute preggo shirt that's on clearance. There will be a day and time for all of that, but it is not today. Today you are child-free. So go do something that can only be done today. Focus on what is happening around you here and now and let the future take care of itself.


4. Cancel the Pity Party

I am a really good hostess when it comes to pity parties, but let's fact it, they don't help. When I think about my situation and put it into perspective of what the average person in the world is going through, I quickly realize that I really have nothing to throw a party over. There are people starving, living in war torn areas, fighting cancer, and losing their families in tragic natural disasters. I live an amazing life- I just haven't been able to reproduce yet. It is a real struggle, but definitely not at the top of the list. Okay, I guess I can put away the party hats...


5. Choose Joy

My life is wonderful and I am blessed in so many incredible ways. So why is it that I get so focused on the one thing that I don't have instead of all of the things that I do? It is easy to get discouraged when I look at everyone with babies and me without one. But if I made a list of all of the amazing things that I have been blessed with while being completely undeserving, I could fill a book. Instead of putting my attention on what I don't have, I have to make an intentional effort to be thankful for the many blessings in life that I do have!


6. Keep the Faith

I don't know what your beliefs are, but I am a Christ-follower. Between the miscarriage and the waiting, my relationship with and faith in God has been tested. At the end of it all, here is what I know to be true- God loves me, He has a plan for me, and while this world will bring me trouble, He will work all things together for good for those who love and obey Him. I trust His timing and judgement because His thoughts are higher than my thoughts and His ways higher than my ways. 

God has given me all that I have, and it is His to take away. 

If I am never able to have a baby, I am made complete in Him. Nothing that happens to me changes those truths, and it is all that I can stand on when everything else gives way. I pray that you find that same certainty and peace! And when you have a bad day, come back to this truth and rest in it!

I don't pretend to have all the answers. Honestly, this list is as much to make a reminder for myself as it is to help anyone else. Whatever day you are having, and no matter how long you wait, know that you are NOT the only one. Keep your head up- there is a lot to be learned in the waiting. And who you are and become in the waiting is the truest reflection of your character. Make it beautiful rather than bitter!


Small Space Vegetable Garden Techniques: Intensive Gardening

If you are like me and have a small space for your vegetable garden, or just want to get more out of the space that you have, an easy way to fit more plants in less space is to change the arrangement. When it comes to the vegetable garden, it becomes a game to see if I can increase production each year by learning new techniques, and I can get a little obsessed with getting the most I can out of the area. That's when the diagrams come out to find the most strategic plant arrangement possible...


Traditional gardens use rows with unused garden space between each row of plants for walking. Unless you have a large garden area, the rows in between the plants wastes a lot of gardening area. An average 3x6 foot garden planted with the traditional row arrangement will fit only ten plants that all for 12 inch spacing.
Another method commonly used in raised beds and backyard vegetable gardens is the square foot gardening method. In this method, the gardener lays out a grid in the garden with each square in the grid measuring one square foot. Therefore, in a 3x6 foot garden, you would be able to fit 18 plants. While this arrangement is a much better use of space, there are still unused areas in the corners of each of the squares that are not utilized.

Intensive gardening still follows the suggested plant spacing of 12 inches, but staggers the rows of plants to make use of the lost corner space in square foot gardening. The spacing for plants in this arrangement are measured at an angle, allowing even more plants to fit in the area. This 3x6 garden will hold 23 plants that require 12 inch spacing! 

More plants means more produce, and more produce means more yield from the space that you have. This is just one of many ways to increase your yields, but it is a very simple technique to implement in the backyard vegetable garden. I hope you have a very productive vegetable garden this year!

Spring into Fruit Trees!

I love spring! First of all, the weather is so nice and warm- all of nature is bursting with new growth and energy and you can't help but join in by rolling up your sleeves to dig in the dirt. My vegetable plants go in the ground early, but the first signs of spring are in the fruit department. This always gets me excited, because every flower equals one fruit that I will get to harvest and eat later! 

Fruit is so expensive to buy, but so good for you! We go through a lot of fruit at our house. One of the best investments in our yard has been putting in fruit trees. They easily pay back your investment after just a couple of harvests but will keep producing for years and years. Currently in our yard we have 5 blueberry bushes, Crabapple, Fuji apple, Baldwin pear, Hood pear, grapevine, blackberry vines, Meyer lemon, satsuma, grapefruit, kumquat, and pomegranate. I know it sounds like a lot, but we enjoy them so much that we just ordered 3 more dwarf trees! Here are a few of my favorite sights in spring...


Our Balwin pear bloomed for the first time this year, which means we will get our very first harvest of pears in late summer/ early fall. Some little pears are already forming!

The mulberry was our first fruit tree. Here are some little berries on our mulberry tree. Mulberries don't technically bloom- they have little curly hairs on them for pollination purposes. I don't mind as long as the tree is covered!

Blackberries everywhere! So many little flowers with bees buzzing all around to pollinate each one. I have let the vines take over the entire back fence and we will probably get about 8 lb. of berries this year. I can already taste the summer berry smoothies :)


Satsumas (a kind of citrus) will have a heavy production year followed by a light one. This is our heavy year, and the tree is absolutely loaded with blooms.

I just love the little purple flowers on the lemon tree. So dainty and cute! And they smell like honeysuckle :)

Blueberry bushes don't have very showy blooms, but look like little white bells. Our bushes are still young, but put out a good amount of berries.

These pink Fuji apple blossoms make me smile. This is another tree that we will get our first fruit from this year. So exciting!

What is blooming in your garden right now? Anything promising some delicious treats later? I just love that I'll already be enjoying fresh fruit while my vegetables plants are just getting rolling. Hello, spring! It's been a while...

Canned Citrus Cranberry Conserve

I had some leftover cranberries in the freezer that I have been meaning to get to and finally had some time today! I had enough for two different canning recipes- a whole cranberry sauce and a cranberry conserve! In case you have never had a conserve before, it is a chunky spread that is a mix of fresh fruit, dried fruit, and nuts. They go great on pastries, cheese trays, or a garnish for meats.

What you need:

- 1 orange (with the peelings!), finely chopped and seeded

- 2 cups water

- 3 cups sugar

- 4 cups cranberries (fresh or frozen)

- 1/2 cup raisins

- 1/2 chopped pecans (can substitute other nuts if desired)

- Canning jars and lids and canning set

Combine oranges and water in a large sauce pan. Bring the water to a boil, then reduce the heat, cover, and simmer for five minutes until the peels soften. 

Add the cranberries, raisins, and sugar and stir until the sugar dissolves.

Return to a boil on medium high heat stirring constantly. Boil hard for 10-15 minutes until the mixture thickens. Remove from heat and do a gel test to see if it is ready. Stir in the nuts and continue to stir for 15 more minutes. Dip a spoon in and if the mixture sheets of instead of drips off then it is ready.

Ladle the mixture into sanitized jars leaving 1/4 inch headspace. Process jars in a water bath for 15 minutes. 

This conserve is sweet and tangy...just right!