Satsuma Jelly Recipe

One of the wonderful things about growing your own fruit is having fresh fruit in-season for free. The problem comes when you have WAY more than you can eat or give away! Of course this is a good problem to have, but for those who don't want great fruit to go to waste, it is time to get canning!

This recipe would probably work with many different kinds of citrus fruits such as clementines or mandarins, but we used a Louisiana favorite- satsumas! Satsumas are the jewel of the humid south. They are easy to peel, usually seedless, very sweet and produce like crazy! We ate two or three a day for months and then had to figure out what to do with the rest before the first hard freeze.

What you need:

- 3 1/2 cups Satsuma juice

- 5 cups sugar

- 1 1/2 teaspoons lemon juice

- 1 package Sure-Jell

- canning jars and lids

Makes 6 half pint jars.

Pick a LOT of satsumas and peel them, then juice them. We used a juicer to do this and ended up with a lot of waste, so if you are making just one batch instead of four like us, I would juice them by hand the old-fashioned way.

Once you have all of your juice and other ingredients ready mix the satsuma juice, lemon juice, and box of Sure-Jell in a sauce pot with tall sides. Stir continuously until you have a rolling boil for one minute (rolling boil while still stirring, that is). Then add the sugar, still stirring, and bring to a boil once again for one minute. 

Ladle into sterilized jars, put on the lids and boil in a water bath for 10 minutes. Once you take the jars out of the water bath, let them sit for 24 hours to cool and jell properly. It was a pretty simple process, and the result was a beautiful, sweet, and slightly tangy jelly that I can't wait to spread on a steaming hot biscuit!

I was so pleased with the results and it came out perfectly jelled! I hope your batch comes out just as tasty!

Reasons to NOT refrigerate fresh eggs


Did that title just say to NOT refrigerate eggs? Isn't that unsanitary??? I'm also going to tell you not to wash them. Don't leave just yet- I'm not crazy, and have very good reasons for this advice!

Guess what? When I got back yard chickens, I learned something that I had literally never heard of before- NOT refrigerating eggs! For anyone living in the United States, this idea is shocking, but for the rest of the world, it is old news.

First, let me tell you why Americans DO refrigerate eggs. Eggs can carry salmonella, and storing eggs at room temperature is the best environment for it to multiply. But storing them at room temperature is not the source of the salmonella, just the growing environment. Where does it come from?
Salmonella is significantly more likely (as in, off the charts) to appear in eggs from: 
1. Large flocks of hens (thousands of them)
2. Unsanitary conditions (such as cages stacked on top of each other)
3. Close quarters (usually about 1 square foot of space per chicken)


As it turns out, most of the eggs produced in the United States meet all three of those conditions. Because the eggs are produced in such an unsanitary environment, the eggs go through a thorough washing and bleaching process before showing up at the grocery store. This seems like a good idea considering where the eggs came from...

The only problem is that chickens lay eggs with a natural protective coating that keeps bacteria out. When eggs are washed, this protective coating is removed, making the eggs more susceptible to entering pathogens. The solution? Store the eggs in a refrigerator where the bacteria is less likely to exist. 
It seems like every solution along this track only causes another problem. If we take things back to a simpler time, the problems solve themselves, which allows me to keep my eggs out on the counter with no worries.


The Alternative
If you are raising backyard chickens and are producing your own eggs, then you probably don't have thousands of chickens. My flock is currently ten chickens, and that is way more that enough for us. As a result of a small flock, they most likely have plenty of space to peck around without sitting in each others' poop and growing diseases all day. When they do lay eggs, you are able to pick them while they are nice and clean, still having the chickens protective coating on them. If they don't need to be washed, then they can be safely stored out on the counter for a MINIMUM of 21 days.


Why 21 days? When chickens lay eggs, they lay a large clutch and then sit on them to warm them in order to hatch them. From the first egg of the clutch being laid to the last before being sat on is usually around 21 days, which means eggs were designed to last at least that long in original condition. Eggs can last longer than that, but 21 days is the minimum. 


So why are eggs on the counter better than eggs in fridge? For me, fridge space is always a precious commodity, so having a little extra is great (especially if you are getting a couple hundred eggs each month), but there is more to it than that.

You may have seen baking recipes that call for room temperature eggs. Eggs at room temperature (and especially ones that have never been refrigerated) bond with the ingredients differently and form air pockets that expand during baking which make lighter and fluffier baked goods, especially breads. This also makes a big difference when whipping egg yolks to make a meringue- definitely fluffier with room temp eggs.


If for some reason you get a few eggs that are really gross (sometimes chickens are just not careful about where they poop) then I would definitely recommend washing them and putting them in the fridge. But other than that, fight the urge to do what you've been told to do all your life, and let those natural eggs stay natural!

So what do you think? Are you willing to take the challenge with your backyard eggs?

Simple Dehydrator Kale Chips


I'm so excited about the dehydrator I got for Christmas! The first thing I wanted to make was some crispy kale chips. I have made kale chips countless times in the oven, but the always come out just a little singed or still a little soggy. WHile I would settle for that with no dehydrator, I am glad to now be able to make the perfectly crispy kale chip.

What you need:
- Kale leaves
- Olive oil Pam spray
- Sea salt

Start with a fresh batch of kale leaves from the garden. Wash them well and let them dry.


Coat the leaves with olive oil. The first batch I did I rubbed with olive oil until completely coated, but they took twice as long to dehydrate as they were supposed to. For the second batch I used the Pam olive oil spray to lightly coat the leaves. Perfection! (and probably healthier...) Hand sprinkle some salt over the leaves. 


Lay out the leaves on the dehydrator sheets, making sure that they don't overlap. Set the dehydrator on medium for 3 hours (or in a humid place like Louisiana more like 5 hours...) You will know they are done when you hold them up by the stem and they stand straight without flopping over at all. When crushed between your fingers, it should crunch and crumble like a perfect kale chip!


Oh my goodness! Kale chip perfection! That crunch...that hint of salt...and silky smooth olive oil. Just writing this makes me want to go make another batch! I'm definitely addicted.


Roasted Pumpkin Seeds


This recipe is so easy and dee-licious! I know, I'm just getting around to roasting the pumpkin seeds from the pumpkin from October, but at least I got to it before the new year. Before you throw away your decorative pumpkins next year, wait until after you make this tasty snack!

What you need:
- Pumpkin seeds from 1 pumpkin (about 2-3 cups)
- 1/3 cup Butter, melted
- Sea salt

First, the messy part- cut open the pumpkin and pull all of the seeds out of the slimy insides. Put the seeds in a strainer and wash them really well to get off all the slimy orange pumpkin pieces. (Optional: feed the rest of the pumpkin insides to the backyard chickens waiting for their treat).


Next, wait for the clean pumpkin seeds to dry. At first I laid them out on a baking sheet. After waiting for a few hours with not much progress (or patience on my part) I tossed them in the dehydrator on the sheet for liquids and they were crispy dry in less than half an hour.


No matter how you do it, once they are completely dry, toss the pumpkin seeds in 1/3 cup melted butter. Spread the mixture out on a baking sheet so that the seeds don't overlap. Well, do the best you can, they are slippery little things, and they love to overlap. Sprinkle the whole pan with salt to taste.


Bake on 350 degrees for 20 minutes until golden brown and crunchy. Once they cool off, go ahead and eat them by the handful! They are so good! Crunchy and salty, plus full of protein. DH and I love to sprinkle them on salads instead of croutons :) 


To keep them fresh and crunchy, store them just sitting out on the counter without covering them. I know this sounds strange (especially for us in our humid climate) but it definitely works. This tasty snack probably won't last a week, but they will stay good and crunchy for up to a week just sitting out on the counter. Hope you enjoy!!!

Homemade Hot Sauce


I had a bunch of peppers leftover from my mini pepper plants over the summer, and I have been debating what to do with them. I used some to make pepper jelly, but it was SO spicy. I tried adding just a few into a jar of salsa, and talk about some KICK! They were too hot to really do anything with, so I decided to make a batch of good ole' homemade Louisiana hot sauce :)


I adapted this recipe from one I found in the book Little House in the Suburbs (great book, btw).

What you need:
- 1/2 cup white vinegar
- 3/4 cup apple cider vinegar
- 1/2 cup tabasco peppers with the stems cut off
- 1 tsp salt
- 1/2 tbsp garlic

Simmer the salt, peppers, and vinegar for 5-10 minutes. Make sure to do this in a well-ventilated area.
WARNING: It is best not to breathe at all if possible during this step. If you must breath, you may want to put your shirt over your nose and mouth. You probably also want to turn off your AC or heater, because when that thing kicks on in the middle of the project and those potent fumes start swirling around, it's not good! (Not that I know from experience...)


Next, take the mixture off the heat, cover it, and let it cool. Take this time to air out the house. Or just go outside and take some deep breaths without feeling like your throat is burning.


Once it is room temperature, add the garlic and blend the mixture in a food processor until sludgy. When you open the top of that food processor, it is another good time not to breathe.


Then pour the sludge through a fine sieve to strain out all of the skins, pulp, and seeds.


Then pour it into a bottle and keep it refrigerated. It should stay good indefinitely! I made three batches, which gave me 1 3/4 olive oil bottles. I guess I could have measured it in cups before pouring it...oh well.


I was just curious to see if my chickens, who eat literally anything, would be interested in the leftover pulp. It smells so strong!


Yep, they ate it all...


How to Harvest and Make Ground Ginger


As I was cutting back all of the dead summer plants in my garden this winter, I had Christmas on the brain. Cutting my ginger plants, which have such lovely and potently fragrant white blooms during the summer, got me wondering if ground ginger (and gingerbread cookies!) could somehow be derived from my ginger plants. A little research soon uncovered that ginger root and ground ginger do come from the beautiful flower that I happened to have as a decorative plant in my garden!

It turns out to be a simple process, so I decided to share! Also, I got to use three of my Christmas presents in the process (mandoline, dehydrator, and electric food mill). Love, love, love new kitchen gadgets!

In case you are wondering if you have it in your garden as well, there are several different varieties, but my plants look like this:

After the ginger plants die back in the winter, it is the perfect time to harvest the root, which is actually a rhizome, to use as a spice for different recipes. You will want to dig up a few of the rhizomes that are from the previous year's growth rather than the new growth that just started in the past spring. Either will work, but the older the rhizome, the stronger the flavor will be. I had a few rhizomes growing out of the garden into the yard, so I started with those.


After digging up a few and rinsing them off, I was ready to get started on the experiment! As you can see, these rhizomes still have some green on them as they are younger, but the older ones will have a completely brown skin.


 Peel off the skin off with a vegetable peeler. The inside will have a thick, white, fibrous texture. Some recipes call for ginger root, and you would use the ginger at this point for those recipes. But for recipes calling for ground ginger, we continue the process.


 Use a mandoline slicer to create thin slices. Side note- mandolines are amazing!


Put the slices in a dehydrator on medium for about an hour. I was surprised at how fast the ginger dried! It ends up looking like paper thin sawdust curls.


 Put the completely dehydrated ginger flakes in a food mill or coffee bean grinder.


 Grind for a minute or so until most of the ginger is a powder.


Shake the powder through a fine strainer or sifter to separate out any pieces that didn't chop up fine enough.


And what you have left is ground ginger! You can store it in an airtight glass container or spice jar. I can't believe the price I have been paying for ground ginger and ginger root while I had it growing in my backyard all along! Go figure.


What about you? Do you have any ginger in your yard???

DIY Decorative Magnetic Chalkboard

This has been one of my favorite projects that I have made this year! It is a magnetic chalkboard in a decorative frame with a touch of shabby chic-ness! There are quite a few steps to make this, but here goes...

What you need:

- wooden plate frame

- plaster of paris

- acrylic paint

- paintbrush

- sandpaper or sanding block

- 9 in. baking tin

- chalkboard spray paint

- chalk

- ribbon

- decorative fabric flower, feathers beads, etc.

First you will need a wooden plate frame. A family member of mine used to collect those painted plates with scenes from different movies, etc. Well, to go along with these collector plates, they had boxes of wooden plate frames. So, you will need one wooden collector plate frame.

Lay your frame on some newspaper. Now it is time to paint it with some homemade chalk paint. You can buy chalk paint, but mixing your own is cheaper, and you can choose from any color of paint! To make chalk paint, simply mix your choice color of paint with a little bit of plaster of paris. I couldn't tell you the proportions because I usually just go by the consistency, which is different for each paint. You don't want it so chalky that it is clumpy- it should still be smooth, but thicker than regular paint.

Once your chalk paint is mixed, put a thick coat on your frame. Only one coat of paint should be necessary with the chalk paint. Don't get too perfectionistic with your paint job, you are going to be sanding it off in the next step anyway! Let it dry completely.

Now take some fine grained sandpaper or a sanding block and sand down the chalk paint so that the wood shows through along the edges of the frame. This should look like natural weathering, so it will be uneven and rustic looking. Be sure to use the wood's natural rises to your advantage to give it more depth. Here are two frames side by side of before and after the sanding.

Brush off the paint dust and get ready to make the chalkboard part! What makes the adorable magnetic chalkboard center of this decorative frame? A simple dollar store 9 in. baking tin.

Take your baking dish and spray paint the back side of it with chalkboard paint. Make sure the pan is completely covered with a thick coat of paint. It is better to do several thin coats letting each coat dry before adding the next to get the best effect.

Then attach the baking tin to the frame. The frames already come with hardware on them. I take all of it off, saving the screws and the hanger to use again later. Use a hammer and nail to punch five holes in the lip of the baking tin- one on each side, one at the bottom, and two at the top the exact distance of the holes in the hanging hardware. 

Use the screws saved from before to screw the baking tin into the frame with a hand held screwdriver.

Now you should have a completed frame!

Next you can add any decorative touches that you want. I use fabric flowers, beads, and feathers. Hot glue your decorative touches to the frame. I also add a piece of chalk tied to a ribbon that is glued to the frame so that something to write with is always handy!

There are lots of different designs that you can make using these plates frames. The magnetic chalkboard is my favorite, but I have tried several other designs as well.

You can use sheets of cork to create a corkboard.

Or you can slice wine corks and glue them onto fabric covered cardboard to create a corkboard with a little more dimension.

I think these plate frames are the perfect decorative touch for any home as well as keeping organized! Which one will you make?

DIY Picket Fence Boot Rack


Our latest little homestead project was making a boot rack to organize all of our outdoor shoes that tend to pile up by the back door. Since our chickens free range, the shoes that we wear in the backyard, are used ONLY for the back yard. So when we take them off at the door, it turns into a piled mess of old tennis shoes, boots and flip flops. Enter new idea for a boot rack to keep it organized so I don't trip over them getting to the door :)

We used some leftover supplies that we had leftover from other projects, so it isn't for looks- just function at this point.

Supplies:
- 1 part of a section of picket fence
- 2 2x4x8 boards
- 3 fence boards
- wood screws

First we cut the section of picket fencing we had leftover so that it was only 4 pickets long. Next, I custom measured pieces of the 2x4 to go out from the fence at the bottom to equal the width of 2 fence boards. Then I measured 2 more pieces to use as vertical stabilizers and screwed them all together.

Next I cut 2 of the fence boards to the length of the base and screwed them on top (actually DH handled all of the power tools).


 Next we cut some short pieces of 2x4 to create the brace for the top shelf. We measured so that it would equal the width of one fence board, and then screwed them together.


 We added the top shelf onto the supports, and then added a screw into the back of each picket to make the whole thing a little more sturdy.


 All done! Took less than half an hour! Not bad for a Saturday afternoon project. I will probably paint it later...maybe next Saturday.


Fabric Paint Stamped Tea Towel

A friend of mine has an adorable house, and it is difficult to give a decorative gift to someone with an adorable house, because everything always looks perfect! If you need a gift for a person like this, don't give up and buy a gift card just yet! These super cute and trendy fabric stamped tea towels are a great idea. They are custom made, so you can fit the colors and designs to any decor, and even a non-crafty person can create a memorable gift for

yourself

 a friend.

What you need:

- Cotton linen tea towels

- Martha Stewart Tintable Fabric Medium

- Acrylic paint

- Rubber stamps

- Ruler

- Pencil

- Foam brush

- Waxed paper

To make these adorable stamped tea towels is an easy project. First gather all your supplies- choose which paint colors you want to use and which designs of stamps. Next think through the design that you want to put on the towels (the possibilities are endless!). I did four different designs for this particular project. 

First pre-wash, dry, and iron the towels to have a clean surface to design. Next, lay out the design. I measured where each stamp would go in advance, and marked those spots with a pencil, making a tiny dot.

I also put my towel on top of a plastic tablecloth, just in case any paint bled through!

Take your first color of paint and mix it with the tintable fabric medium. Make sure to shake both well before using. When mixing the two together use a 1 to 1 ratio of paint to fabric medium.

After you mix the paint, I use a foam brush to paint it onto the shiny side of waxed paper. I then put the stamp into the paint on the paper to make sure that the paint is evenly coated on the stamp before stamping it onto the fabric. You could also paint it onto the stamp with a brush, but I like the waxed paper method.

Carefully stamp your design where the dots are marked, making sure to recoat the stamp with paint in between each stamp on the towel. You may want to practice stamping the paint on paper before you go to the fabric, just to get the hang of it!

Use as many colors and designs as you would like! Cleanup between colors is easy- just rinse out your stamp and brush with warm water. Since the paint is acrylic, rinsing it off is a breeze!

Once you are finished, let the towels dry for 24 hours. I know...waiting. 

After that, you have to heat set the designs to make them permanent. This is the most boring part. Iron on the wrong side of the fabric using a DRY iron (steam could smear the design) set on medium to high heat.  Iron in small sections, making sure that each section is heated evenly for 3-5 minutes. Yes, add up those minutes in your head and you will realize that 4 towels took over an hour. So, put on some music or a movie, get comfy, and iron away.  

Once the design is heat set, the towels are finished! The are machine washable and dryable on the delicate cycle. Now these tea towels are ready to take your kitchen cuteness to the next level! The great thing about this project is that you can use this same method on anything fabric- pillow cases, shower curtains, table runners, cloth napkins, curtains, throw pillows, table cloths, lampshades, Christmas tree skirts, etc. So once your kitchen is cute, start custom designing everything else in the house!

How did yours come out???

How to Cut Costs on Rabbit Feed


Raising meat rabbits is a great way to grow and process your own meat for urban homesteaders. They are quiet, don't take up much space, multiply quickly, and are very cost efficient. After the initial set up of cage and watering and feeding systems, the only cost for raising rabbits is the feed. While the feed isn't too expensive, (about $15-$20 for a 50lb. bag), there are some simple ways to cut even these costs pretty significantly.

Rabbits can live healthy lives in captivity with up to 90% of their diet consisting of greens and natural materials. By feeding them greens, they have a more balanced, varied, and natural diet for your rabbits. Here are a few easy ways to cut food costs with minimal effort.

1. Trees and Leaves
My rabbits love eating leaves from trees. We have several "trash trees" that grow little saplings around the edge of our yard. No matter what I do to cut them back, I can't seem to kill them for good. Once I got rabbits, I started cutting off the new shoots and small branches and putting them in the rabbit cages. They nibble off all the leaves, and then we put the wood through the mulcher to add to the compost. Not only does this replace pellet feed, it adds mulch to the compost, and keeps my icky weed trees in check. They can't grow faster than my rabbits can eat! Also, after a storm sometimes branches of bunches of leaves will fall out of my oak trees, and the rabbits love those. So I just gather them up and fill the cage :)


2. Weeds
Weeds always annoy me because they take nutrients from my plants, are a pain to pick, and can't be composted unless you want them all to multiply. Lose, lose all around. But with rabbits, weeds can actually serve a purpose to replace feed. When I weed my raised beds, I put all of the weeds in a bucket, and then dump it into the rabbits cages. They LOVE eating weeds, and I love having a place to dispose of them where I know they wont end up back in the garden :)

3. Kitchen Scraps
I have always composted my kitchen scraps, but now I divide my scraps into to different containers- one for the compost pile (which usually becomes chicken food) and one for the rabbits to eat. Rabbits will eat carrot, radish, and turnip tops, any vegetable ends like celery, and some fruit rinds like watermelon and pineapple. Oddly enough, lettuce isn't good for rabbits, so just toss that in the compost. You may be wondering how your compost pile will ever grow if you feed it all to the rabbits, but trust me, rabbits compost these items MUCH faster than the compost pile would, and they make meat while they're at it!


4. Garden Waste
At the end of a season when pulling up your plants, instead of tossing them in the compost, toss them to the rabbits. My rabbits favorites are the leaves and stalks of bean, peas, sweet potatoes, tomatoes, cauliflower, broccoli, cucumbers and peppers. The only thing I have found so far that they didn't like was green onions. Also, sometimes I have plants that get destroyed by bugs and can't be eaten or that have leaves at the base of the plant that turn yellow. I trim these leaves off and give them to the rabbits as well. Giving them too much of one kind of plant all at once can mess with their digestive systems, so I usually pull a few plants a day for several weeks instead of emptying the garden all at once.


5. Lawn Clippings
We have a lawn mower with a bag so we can collect our lawn clippings. We put most of it into the compost (where the chickens happily slurp up the trimmings), but we also put some in a bowl in each of the rabbit cages. They love grass (go figure) and will eat as much as I put in there.

6. Prunings
At the end of each season, I cut back all of my plants, pruning, dividing, etc. This is a great time to find some treats for the rabbits. My rabbits eat banana leaves, ginger, and fruit tree trimmings just to name a few. I would look up some of the plants in your yard before giving it to them just to be sure, but most things make a great treat for the rabbits.


7. Free Ranging
My rabbits love to hop around in the back yard and nibble in the grass. We try to take the rabbits out of the cages every so often and let them run around in the fenced in yard. We do have to stay out with them to keep an eye on them, but they love the freedom to hop around, play with the chickens, and nibble all the different things on the ground.

Some of the plants that I feed my rabbits can supposedly cause diarrhea, but I guess it depends on your rabbits because mine have never had any problems. Keep an eye on your rabbits though to see is they have a bad digestive reaction to any plant in particular.


Food Determines Mood
Now that we have been feeding our rabbits greens pretty regularly for a year now, we have noticed that they have become much more friendly and cuddly, especially our breeders. They ignore when we fill up the pellet container and wait at the cage door for their treats. The greens are what they really want! Now, raising the baby rabbits for meat on mostly greens will slow down their growth rate, so I would give them greens in moderation if you are on a time schedule, but for the breeders, the more greens the better!

Do you have some tips for cutting the cost of feed for your meat rabbits? Feel free to share!

12 Days of Anticipation: Day 12 God's Unstoppable Plan


Day 12- God's Unstoppable plan

Everything that happens next in history is Satan's attempt to stop God's plan from unfolding, and God outwitting him at every step! Herod tried to kill Jesus by murdering all of the baby boys, but God sends the family safely to Egypt. Satan uses Jesus' own disciple, Judas, to betray Him to His death, but that death was His very plan all along. The guards try to keep the body from being stolen, but Jesus rises from the dead! The chief priests try to cover it up with a lie, but Jesus appears to many people before ascending to heaven. The chief priests arrest, torture, and kill many of the disciples to keep them from preaching, but the church grows every with day. The story continues throughout thousands of years of history- Satan attempting to stop this spread of the truth that life and hope can be found in Jesus, and truth prevailing all the same.

This is why we celebrate Christmas! This is why we live our lives for Christ every day. This is why we believe so many things that are contrary to this world- that to die is gain, that those who mourn are blessed, that persecution brings joy, that we should love our enemies. You are a part of God's continuing plan. Each generation has its own challenges to face in spreading the good news that the angels announced that Christmas night, but this is our time. Right now we are on the front lines. Some days it may seem that the world is too dark, that hope is too far away, that there is not enough strength to fight it, but that is exactly what the enemy wants you to think. The story continues...

What role do you play in God's unstoppable plan?
In what ways have you allowed Satan to keep you from spreading the truth about the significance of Jesus?
Have you been distracted by the world and kept from doing your task?
How can you be more intentional in the new year about sharing life and truth with others?

I hope you have a merry Christmas, celebrating and rejoicing in the amazing and miraculous birth that we stop to recognize. Glory to God in the highest, and on earth, peace to those on whom His favor rests!

Click on the pictures to read the other days!
Previous Day                                                             First Day

12 Days of Anticipation: Day 11 Giving Gifts


Day 11- Giving Gifts

And now we come to the one part of the Christmas story that society has taken hold of- presents! The idea of giving gifts came from the three gifts that the wise men gave to Jesus as a young child- gold, frankincense, and myrrh. These were not the typical gifts given to a child, but each one represents who Jesus is. The gold is the gift for a King, and Jesus is the King of Kings. Frankincense was an incense burned at the temple as a sacrifice to God, showing that Jesus is God. And myrrh was an oil used in embalming dead bodies- it foreshadowed the death that Jesus would undergo to forgive our sins. While it may seem that the wise men were the ones giving the gifts, it turns out that their gifts only reflected the true gift that was given- Jesus coming to earth.

Society has turned Christmas into a consumer holiday marked by all time highs for shopping with an emphasis on giving that perfect gift to everyone on your list, and not forgetting to buy for yourself along the way. But really, Christmas was always meant to be about giving, not buying. God gave us the greatest gift, and we can share what we have with others because of that gift. We can give gifts of time, attention, compassion, joy, patience, resources, energy, talents, and so much more. We should give all of ourselves to those around us every day of the year because God gave us his only son, and Jesus gave us His life so that we could have life in Him. WHat do we have that doesn't come from him? Could we ever outgive what God has blessed us with? Do we really have a right to anything that we consider ours? We are only stewards, charged with the task of taking what we are given and passing it out. If we take what we are given to only give to ourselves, we miss out on the purpose that God has for us.

What are some things that you can give this year?
In what ways do you find yourself believing that what God has given you is for you?
Take some time to thank God the gift of His Son for us.

Click on the pictures to read the other days!
Previous Day                                                                  Next Day
         

My First Year of Homesteading


So this week marks the end of what I would consider my first year of homesteading. While I had a small vegetable garden and got my first few chickens last year, the chickens didn't really start laying until this year, and we have expanded a lot in the last 12 months, so I would consider 2014 our first year of true urban homesteading.

I know what you may be thinking- I wish I could have a "homestead"! I wish I could have some land and grow some food and get some animals and be self-sufficient! Let me clarify our situation to encourage you. We do not have land (well, unless you count the 0.2 acre lot our house is on), and we do not live in the country (the exact opposite- we are smack dab in the middle of a city), and we are not self-sufficient (although more so than we were last year!). You can be a homesteader no matter what your living situation is. Don't wait until you buy a farm, start where you are with what you have.

To give you a little inspiration and celebrate how far we've come, I would like to share a little of our journey this year with you- how we started small and grew little by little, and how we can't wait to continue growing next year.

Our progression into homesteading has been slow but steady. Some of the things that we are doing are things I never thought I would consider a part of my daily life. Here is how it happened...

Vegetable Gardening
First I started a small raised vegetable garden a few years ago just to grow a few tomatoes, cucumbers, and peppers- it's just sort of something you do in the south. It was 5' x 10', and later I expanded it to 5' x 15'. It was small, but manageable. I bought plants at Lowe's or Home Depot for $3 each. Some years we harvested a lot and other years we didn't get much at all. Monetarily speaking we usually broke even or ended up a little ahead.


Starting Seeds
I then decided to branch out and try a few plants from seeds- I was pretty intimidated by starting my own seeds! Carrots worked out, and beans and peas were so easy and produced a ton! I started experimenting with more and more plants from seeds until almost every plant in my garden was started by seed. Now the gains were much higher, because seeds produce many plants for a fraction of the cost of plants from the nursery. Plus, I now had a much wider range of plants to choose from! Click here for a handy vegetable starting guide.


Composting
One of the most expensive parts of gardening is the dirt! We starting composting all of our kitchen scraps and yard waste to make our own compost, and haven't bought any dirt since! I wish I could tell you how many pounds of nutrient rich "waste" I have composted instead of put in a landfill this year, but I know how much dirt we have made and used, and it has been significant! Composting is too beneficial and too easy not to do :)


Laying Chickens
I had been reading a lot about backyard chickens, and we decided to get a few to experiment. We talked about getting 3-4, but knew they wouldn't all make it so decided to get 5, and then somehow came home with 7 :) We built a coop ourselves from pieces leftover from other projects for pretty cheap. The chickens free ranged in our fenced in backyard which cut on feeding costs and make for a happy flock.


Fruit trees 
In the fall of 2013 we put in several fruit trees around the edges of the backyard. There was a mulberry tree there when we moved in, but we have added a satsuma, kumquat, lemon, grapefruit, pomegranate, grapevine, 5 blueberry bushes, 2 apples, and 2 pears over the last year. While this sounds like a lot of trees, placing them strategically around the edge of the yard or as a part of existing gardens and landscaping has made up hardly notice them at all! The price of fruit in the store is crazy, and we are loving the addition of fruit in our yard!


Raised Beds and Square Foot Gardening
Around this time, we discovered something terrible. All of the vegetables that were our favorites, were also the chickens favorites, and the garden was the perfect place for them to dust bathe. Suddenly almost any gardening became impossible, and we rigged up some netting to keep them out.
This system worked for the rest of the season, but I wanted to make a significant expansion to the vegetable garden, and fence it in to keep out the chickens. We worked all fall of 2013 and were able to put in the first plants in March 2014. We made the new garden all raised beds and planted using the Square Foot Method.


Meat Chickens
After an unfortunate accident involving our flock of chickens and the neighbor's dog, we had to start a new flock. As it turned out, some of our hens in this bunch turned out to be roosters. We knew that crowing in the suburban neighborhood wouldn't go over well, and needed to get rid of the offenders quickly. That is how we happened upon our first meat chicken. Of our 12 chickens, 5 turned out to be roosters, and we quickly learned how to deal with the queasiness and process our own chickens. They turned out to be really delicious! At the same time, we began researching the inhumane treatment of chickens in meat processing plants. We decided not to buy anymore chicken from the grocery store and added meat chickens to our flock. While many people we know consider us raising our own meat to be mean, anyone who eats meat gets it from an animal somewhere! At least this way, we know that our animals had a happy, free ranging life before they had a second purpose of becoming nourishment.


Canning, Drying, and Preserving
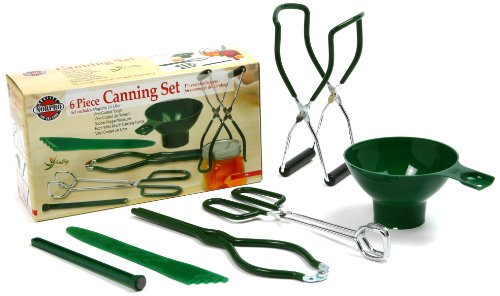
With the expansion of our garden, we started really getting a lot of fresh produce. In some cases there was more than we could eat or give away, so I started learning how to preserve food for later. Drying herbs, canning, pickling, and freezing vegetables, and making jams and jellies quickly became normal, and our pantry was well stocked. You can read the review of our harvest from the spring season.


DIY Household Items
As soon as you figure out you can make your own food, you begin to look at everything differently. When I run out of something around the house, before I put it on the shopping list I ask myself, is this something we can make ourselves? We experimented with a lot of diy household items this year. Some have turned out great, like laundry detergent, and others not so much, like shaving cream. But slowly, we are buying less household products and making more of our own.


Rabbits
My husband had been researching other meat options, and started looking into raising meat rabbits. I dragged my feet for months before starting this project, because rabbits are so cute! It seemed strange to raise them to eat, but they were a lot more practical than starting a new flock of meat chickens every few months. We got two rabbits, and by the time they had grown to mating age, mated, gave birth, and raised the babies to eating age, I was ready to give the rabbits a try. Best decision on the homestead yet! We have now replaced all of the chicken in our diet with rabbit, and gone back to only laying hens.


Selling the Extras
At the end of 2014, I was a part of a few craft shows, and decided to sell some of the extras that I had from our gardening adventures. These were things that I knew we would never get around to eating because we already had so much. I sold dried herbs, pickles, pepper jelly, etc. I was surprised how much people jumped all over locally grown food items that hadn't been grown with any pesticides or fertilizers! I made $63 in profit from just those few extras, and then I realized- now we are homesteaders for real! I already have people asking for more of certain items, so I will be ready with some more farm fresh products next year!


The Year in Review
While we still aren't self-sufficient, and are a long way from it, here are some things that were staples on our grocery shopping list last year, that we haven't bought at all this year!
- eggs
- chicken
- chicken broth
- laundry detergent
- most herbs (there is the random one or two that I don't grow)
- green onions, green beans, cucumbers, pickles (all of the other vegetables I still had to supplement throughout the year)
- bread (that's right, all homemade for one year now- woo hoo!)

This year we produced...
- 22lbs. meat (valued at $88)
- 87 dozen eggs (valued at $348)
- 12 lbs. fruit (not bad for the first year on our trees) (valued at $33)
- 85lbs. vegetables (valued at $226)

That's a total of $695 worth of food that we grew in our own yard with minimal effort and experience! (I'm basing these prices on regular grocery store prices, NOT what you would pay at a local farmer's market, which would be much more expensive.) Plus, add in the $63 we made from selling finished products and our total comes to $758. We spent $225 on feed, so our final profit value was $533.

Our average grocery bill last year was $50/week. So this adds up to almost 3 MONTHS of free groceries! We used what we had to make more of what we needed- that's homesteading!


What next?
We are looking forward to continuing to grow our homestead next year with new projects already in mind.
- We want to build an aquaponics system in the greenhouse to grow fish and vegetables in a coexistent relationship
- We are thinking about expanding from one female breeding rabbit to two for double the meat production
- I am getting a dehydrator to begin learning how to preserve fresh foods in a new way
- Not sure if this will happen this year, but our area recently made it legal to have bees within the city limits, so that is on the list for the future as well!

What about your homestead?
So what steps are you going to take this year to be a little more self-sustaining? Think about what you have and what you can do with it- you will be surprised at how much can come from just a little!


12 Days of Anticipation: Day 10 Wise Men Seek Him


Day 10- Wise Men Seek Him

The "wise men" were exactly that- a group of academics who studied the stars, an ancient group of scholars constantly searching their scrolls and expanding their knowledge. They had read the prophesies and they knew the signs. When a new star appeared in the sky, they didn't waste time hypothesizing or making attempts to find a scientific explanation or seeing what other sources had to say- they knew that it announced the birth of the new king of the Jews. They followed the star in faith that it would lead them to the site of the birth of this important new king.

On a modern-day list of sought after character traits, wisdom seems to be losing ground. Our society affirms and rewards those who cultivate self-esteem, assertiveness, and independence. The wisdom of the Bible seems to contradict a lot of the motivation behind today's leaders. The book of Proverbs is filled with tips for acting with wisdom rather than foolishness, but sometimes we tend to encourage acting the exact opposite!

Here are a few examples:

Proverbs 1:7
"The fear of the LORD is the beginning of knowledge, but fools despise wisdom and discipline."- We pride ourselves in hiding and getting away with sin, while the wise fear the Lord.
Proverbs 29:11
"A fool gives full vent to his anger, but a wise man keeps himself under control."- We find it important to stand up for ourselves, putting the defense of our own pride ahead of self-control.
Proverbs 14:16
"One who is wise is cautious and turns away from evil, but a fool is reckless and careless."
- YOLO- need I say more?

Proverbs 29:7
"A righteous man knows the rights of the poor; a wicked man does not understand such knowledge."
- Any human injustice, racism, classism, gender bias, etc. all stem from a lack of wisdom.


Proverbs 21:20
"Precious treasure and oil are in a wise man's dwelling, but a foolish man devours it."
- We live by credit, borrowing what we don't have to buy what we don't need.

The wise men used their knowledge to continue their life-long quest for what mattered most to them- wisdom. It is not surprising that the end of their search brought them to Jesus, the source of all true wisdom. We have thousands of voices speaking into our lives everyday- ads, social media, coworkers, music, movies, tv, family, friends, etc. We need to make an effort to balance out these messages with truth by seeking the source of wisdom everyday- Jesus Christ.


Would you say that wisdom is a character trait that you value and foster in your life?
How does the Bible's wisdom contradict with the trends in our society?
In what ways have you believed and acted on the world's wisdom rather than God's?
How can you seek and develop a personal relationship with Jesus on a daily basis to be in touch with His wisdom?

Click on the pictures to read the other days!
Previous Day                                                       Next Day

12 Days of Anticipation: Day 9 Angels and Shepherds


Day 9- Angels and Shepherds

Think about the delivery room- who was present at your birth? Mom, obviously. The doctor? Dad? Possibly some extended family? A baby's birth seems like a private moment, shared between mother and child, and in some cases the father as well. Jesus' birth was a slightly different scenario. Mom and adopted dad were there, along with some farm animals, and no doctor or midwife. What began as an intimate beginning quickly grew to a crowded stable. Even though Jesus had humble beginnings, the angels couldn't help but throw a big party to celebrate God manifested on earth as a human to save the world from sin. However, the angels invited an unlikely group.

There were some shepherds watching their flocks nearby, and suddenly they were overwhelmed by the awesome appearance of a shining angel telling them not to be afraid. The angel delivered the unbelievable news and then was joined by an army of angels all singing praises to God! Can you imagine being able to see such a sight? Needless to say, the shepherd didn't question their invitation but hurried into town to see the Savior and worship HIm. After that, they couldn't keep the news to themselves but went throughout the town of Bethlehem rejoicing and telling everyone the good news. I would imagine that many others would come to see the baby after hearing the shepherds story, but the Bible doesn't mention any. Maybe they didn't believe the shepherds. Maybe they were busy with their own plans. Maybe they just didn't understand the significance of the moment. Whatever the reason, this group of lowly shepherds were the only ones to celebrate the birth of God's Son that night.

Why did the angels choose to invite a group of lowly shepherds? They could have announced their news to anyone. Did the angels choose them because they were in a remote area and the angels could really belt out their song without waking up the whole town? Did the shepherds have more faith? Had they been waiting for the Savior or did the news come as a complete surprise? Maybe they were simply available and receptive to the message from the Lord.

Are you available to hear a message from the Lord?
In what ways do you ignore opportunities to hear from God?
How can you be more willing to listen and become involved in what God is doing around you?

Click the pictures to read the other days!
Previous Day                                                          Next Day
            

12 Days of Anticipation: Day 8 God With Us


Day 8- God with us

Emmanuel. God with us. This is the moment we have all been waiting for! Jesus is born.

Mary gives birth. Pain and anguish are followed by relief and overwhelming joy as she sees her son for the first time. The pain of childbirth, the very curse given to Eve at the first sin, produces the One who will save mankind from it. So much hope, so much anticipation, so many dreams for the future are wrapped in this tiny bundle. Every child is a miracle, but this one is the Son of God. The long awaited Savior with ten perfect little fingers and ten little toes has finally come. The King of Kings with such alert eyes for a newborn. The Wonderful Counselor with an adorable nose. The Prince of Peace with that precious tongue just barely poking out as he yawns. And Mary treasures all of these things in her heart. And what a treasure it is!

And the new father! The pride that Joseph felt when first holding his son, the protective flood of love for this tiny child, was only a small reflection of the deeper expression of our Father's love for us, poured out in this gift of his only Son. What we receive with joy was God's sacrificial gift given in love. How amazing to know that our Father loves us so much!

Mary holds this baby, so tiny, yet an enormous burden. She will love this child born in a barn, raise Him moving from country to country to avoid death threats, lose Him to ministry (who are my mother and brothers?), and even watch Him die a horrific death on a cross. The path will tear at her very soul, but for tonight, she holds in her arms the very One who will be her salvation. As this baby reaches out his arms with a first cry, he enters the world the same way He will leave it, arms stretched out with a final cry. But even that last moment, as far ahead in the story as it is, is not the end!

Have you experienced that flood of love for another human that is only a taste of the Father's love for us?
Have you also experienced the pain of raising children? Losing them in some way?
In what ways have you expressed your gratitude for God's gift of his Son this Christmas?

We wonder why Christmas time always seems so bitter sweet, and I think it is because even the first Christmas started out that way. All great acts of love come at a cost. But true acts of selfless love are always worth the price.

Click on the pictures to read the other days!
Previous Day

12 Days of Anticipation: Day 7 No Entitlement for a King


Day 7- No Entitlement for a King

Jesus could have been born into any circumstances that God chose. Being the Son of God, Jesus is the King of Kings, the Lord of Lords, the Everlasting Savior. A setting fitting for who he is does not even exist on earth, but Jesus

Philippians 2:5-8 explains it this way, "Have this attitude in yourselves which was also in Christ Jesus, who, although He existed in the form of God, did not regard equality with God a thing to be grasped but emptied Himself, taking the form of a bond-servant, and being made in the likeness of men. Being found in appearance as a man, He humbled Himself by becoming obedient to the point of death, even death on a cross."

Jesus was a true picture of humility rather than entitlement- he took on human form, left His home in heaven to be born on earth, he grew up in a poor family, he worked as a carpenter, he did not collect possessions, he accepted abuse from his enemies and loved those who persecuted him, allowed himself to be killed a humiliating and painful death, all so that he could offer us new life- a selfless act. He did not hold out a list of 'rights' as God's Son, but truly experienced the struggles of human life. Why do we think we deserve to be immune from them?


We are sometimes tricked into thinking that life with Christ should be easier- that we will be blessed all the time or that we deserve what God has given us in our lives. The truth is that God tells us that in this life we will have trouble, that we will be persecuted for His name, and that everyday we must take up our cross to follow Him. Jesus did not claim any entitlement or take the easier road as the Son of God. Why do we think we should deserve better than God's own Son?

Have you ever asked God why you were given a certain set of circumstances or challenges?
Have you blamed Him for the situation or family that you were born into?
In what ways has God used those circumstance to shape you into the person that He can use to help others?

Jesus could have spent His time wondering why the challenges placed before Him were necessary, but instead He chose to use those circumstances to reach out to those around him. How could He truly say He loves us and connect with us in a way that we would trust in Him without meeting us on our level? Not only was he born into humble circumstances, it was a leap to choose to be born as a human at all...

Click on the pictures to read the other days!
Previous Day                                                                 Next Day


12 Days of Anticipation: Day 6 No Room


Day 6- No Room

When Mary and Joseph arrived in Bethlehem to be counted for the census, the town was filled with people who had been traveling for the same reason. When they found a place to stay, they were told that there was no room for them at the inn, and they were forced to take shelter in the barn for the night.

What was going through the innkeeper's head as he told them there was no room? Was he physically drained, exhausted from making as many people cram into his establishment as possible and had no corner to fit them into? Was he emotionally poor, looking at their situation without compassion or empathy? Was he financially strained, either unable or unwilling to give resources to help a couple in their time of need? Was he out of time, not having enough hours in the day to complete all that he already had on his plate? Was he spiritually empty, having heard of their story, an unwed couple expecting a child, and chose to judge instead of love? We don't know what made the inn keeper tell Mary and Joseph that there was no room at the inn that night. All we know is that Jesus was turned away.

While I have always been surprised by this turn of events- no room for a pregnant woman about to go into labor- I wonder how many times we have the same reaction as the inn keeper. It is difficult to have room for Jesus in today's world. We have time to check our social media but not to open our Bibles. We seem to have time to not miss an episode of our favorite shows, but frequently miss out on what God is doing around us. The truth is for us, and I suspect for the inn keeper as well, it isn't that we don't have room, but that we don't make room. And when we don't make room for a personal relationship with Jesus, we miss out on having room in our lives to be a part of what He is doing around us. Once you make room for Him, it is easier to make room for the people around us who are hurting and in need- people who WE are meant to reach out to.

What is keeping you from making room for Jesus in your life each day?
What limitations are keeping you from seeing the needs of others around you? Are you lacking physically, emotionally, financially or spiritually?
What is something that you can take out of your schedule so that you can have more freedom of time to help others?
How can you make room?

While Mary and Joseph being turned away seems like an unfortunate and unfair turn of events, God uses even this situation as a statement about who Jesus is...

Click on the pictures to read the others days!
                           Previous Day                                                           Next Day


DIY Photo Transfer Tea Towel

One of the many Christmas presents that I decided to make this year were photo transfer Tea Towels! I saw some on pinterest that were so cute, to I made a ton of them for gifts this year, and they turned out great! Let me show you how it works.

First print out ANY image- color or black and white, graphic or photo, etc- on a LASER printer. This will not work with an inkjet, so make sure its laser. If you are printing anything with words, make sure you print the mirror image so it comes out right in the end.

Next, cut out your image to exactly what you want transferred to the towel. Keep in mind that even the negative space, or white parts of the picture in this case, will transfer on to the towel. So if you are using a colored towel instead of a white one, the negative space may look a little funny.

Next, iron out your towel. Mine are also pre-washed and dried. I used Aunt Martha's flour sack towels. They have that vintage look and feel to them without being super pricey. 

Now for the secret sauce! You are going to use Mod Podge photo transfer medium to work your magic. It comes in 2 ounce or 8 ounce bottles.

Lay your image on a piece of wax paper.

Glob on a bunch of the Mod Podge...

And then use a foam brush to cover the entire image with a THICK coat. It should be 1/16" thick and cover the entire image.

Next, carefully take the image off of the wax paper touching only the back and sides of the image. Lay it on your tea towel mod podge side down. Start in the center smoothing out your image, making sure there are no air bubbles. Make sure all of the edges are stuck down well, and if any of the mod podge squishes out the sides, wipe it off with a damp towel.

Now wait at least 24 hours for it to dry completely. I live in south Louisiana where our humidity was 98% the day of the project, so I waited 36 hours just to be safe, and it turned out great.

Next use a water and  a sponge to wet the entire surface of the image. Let the water soak in for two minutes.

After two minutes, rub the sponge over the surface of the image in a circular motion to rub off the paper.

Make sure that all of the paper is removed. If you rub your fingers over the image and paper pieces are still rolling off, then keep scrubbing. 

Once all the paper is removed, let the image cure for 72 hours. After this time period, your towel can be machine washed and dried, just make sure to not dry clean it or iron over the image.

Now, you're done! Enjoy sprucing up your kitchen with a personal touch or giving a gift that is handmade!

12 Days of Anticipation: Day 5 Unexpected News


Day 5- Unexpected News

Mary is just a teenager, living her life. She is betrothed to marry Joseph, a good man. I'm sure they had plans of building a house (one of the perks of marrying a carpenter), raising a family, and building a life together. It is every girl's dream-  a beautiful wedding to the perfect guy, and settling down into the cute house with the white picket fence, later adding two kids and a dog. I'm not sure what the Israelite version of this would have been, but I'm sure the anticipation and wistful excitement were the same. And then God, as He is known to do, took all of their plans and inserted His own.

An angel appears to Mary and gives her some incredible news- she will be the mother of the Savior whose kingdom will reign forever and she will conceive a child by the Holy Spirit even as a virgin. This news changed everything, and I'm sure it took a while for her to process all of the repercussions. She knew the Old Testament teachings and prophecies, she had been waiting for this day just like every other Jew. While she knew the coming of the Savior would change her life, I'm sure she hadn't ever considered being his mother!

While being the mother of the Savior was an honor, it obviously came with its challenges. I'm sure she weighed the costs in her mind. She would most likely lose Joseph- how could he believe such a tale? She would certainly lose her reputation- she could even be stoned as a prostitute for being pregnant out of wedlock. She could be kicked out of her family with no place to live. Suddenly all of the dreams for the future melted before her eyes at this unexpected news. While she could have blamed God for her loss or chosen to be a victim, her response is completely different. She sings a song!

"And Mary said:
My soul glorifies the Lord
and my spirit rejoices in God my Savior,
for he has been mindful
of the humble state of his servant.
From now on all generations will call me blessed,
for the Mighty One has done great things for me-
holy is his name.
His mercy extends to those who fear him,
from generation to generation.
He has performed mighty deeds with his arm;
he has scattered those who are proud in their inmost thoughts.
He has brought them down rulers from their thrones
but has lifted up the humble.
He has filled the hungry with good things
but has sent the rich away empty.
He has helped his servant Israel,
remembering to be merciful
to Abraham and his descendants forever,
just as he promised our ancestors."
  Luke 1:46-55

Mary response is one of faith. Instead of mourning the loss of her own plans, she realizes the importance of God's plan and trusts him to take care of the details. She not only knows that God's plan is better than her own, but her response models it. Maybe that is why she was the one chosen for the task.

Has God given you an assignment that was unexpected?
Have you taken this life-changing news with a song or have you grudgingly resented the change in plans?
In what ways have you not trusted God to provide for you when following His plan rather than your own?

How you react when God wants to use you in His plans makes all the difference in the world. At least, it did for Mary...


Click on the pictures below to read the other days!
Previous Day                                                                     Next Day